How to Nail Shingles to Roof
Do you want to learn how to safely, quickly, and successfully nail shingles on your roof? Well, then you’ve come to the right place. In this article, we will cover all the essential steps involved with how to Nail Shingles to roof that will make sure your project is successful and maximizes the life of your new roof.
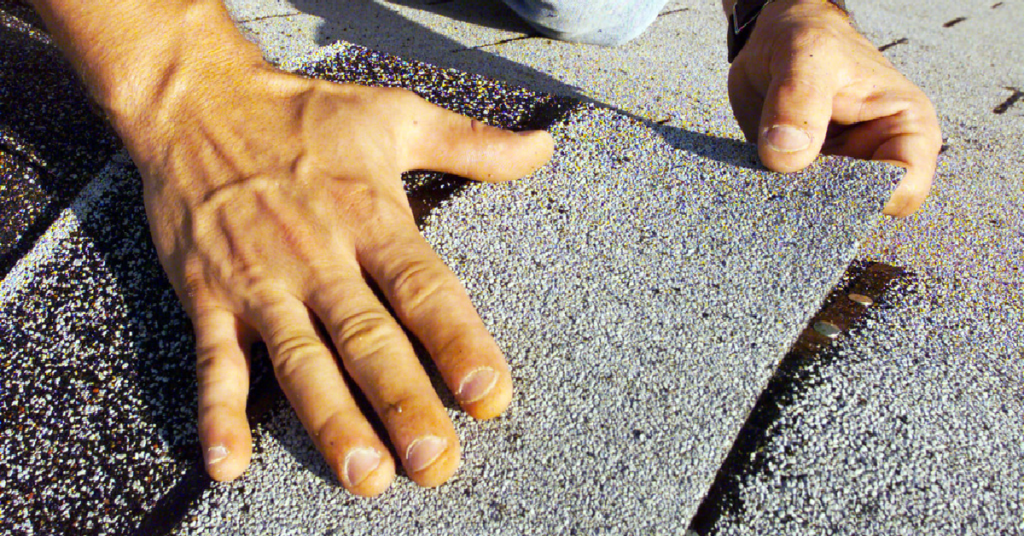
Whether you’re experienced in DIY home improvements or if this is your first foray into tackling such a big job, after reading through our guide, you’ll be equipped with all of the information needed for doing a top-notch job. So let’s get started!
Choosing the right type of shingles for your roof
Before we jump into the actual process of nailing shingles onto your roof, it’s essential to choose the right type of shingles for your specific needs. Different types of shingles are suited for different climates and weather conditions, so it’s critical to do some research and make sure you’re picking the best option for your home. Here are a few factors to consider when choosing shingles for your roof:
- Climate: Some types of shingles are better suited for hot and humid climates, while others are designed to withstand colder temperatures and heavy snowfall. Be sure to consider the climate in your area before making a decision.
- Roof pitch: The slope or pitch of your roof can also play a role in which type of shingle is best. Steeper roofs require shingles with more grip, while flatter roofs can use a smoother shingle.
- Material: Shingles come in a variety of materials such as asphalt, wood, metal, and tile. Each material has its benefits and drawbacks, so be sure to research which material will work best for your roof.
Once you’ve determined the type of shingles you need, it’s time to move on to the next step: preparing your roof for installation.
Tools and Materials Needed for Installing Nail Shingles on a Rooftop
Before you begin the nailing process, make sure you have all of the necessary tools and materials. Here is a list of what you’ll need:
- Shingles: Be sure to purchase enough shingles for your entire roof, with some extra in case of any mistakes or damaged shingles.
- Roofing nails: These specialized nails are designed specifically for roofing and come in various sizes. Be sure to choose the correct size for your shingles.
- Roofing hammer: A roofing hammer is specially designed with a flat head for nailing and a claw for removing nails if needed.
- Ladder: You’ll need a sturdy ladder to access your roof safely. Make sure it’s tall enough to reach your roof comfortably.
- Safety gear: It’s crucial to wear safety gear such as gloves, eye protection, and non-slip shoes while working on your roof.
- Other tools: Depending on the type of shingles you’re installing, you may also need a utility knife, chalk line, and a roofing square.
Safety Precautions
Working on a roof can be dangerous, so it’s essential to take proper precautions to ensure your safety. Here are some tips to keep in mind:
- Always have someone else present while you’re working on the roof.
- Use a sturdy ladder and make sure it’s secured before climbing onto the roof.
- Wear appropriate safety gear at all times.
- Avoid working on the roof during extreme weather conditions or when it’s wet/slippery.
- Follow all manufacturer instructions and safety guidelines while using tools and materials.
Preparing the Roof Surface
Step 1: Roof Deck Inspection
Before installing shingles, it’s crucial to inspect the roof deck for any damage or rot. If you find any issues, make sure to address them before proceeding.
Step 2: Underlayment Installation
The underlayment is a protective layer that goes between the roof deck and shingles. It helps to prevent water and moisture from seeping into your home. Roll out the underlayment horizontally, starting at the bottom of the roof and working your way up. Be sure to overlap each row by around 6 inches.
Step 3: Installing Drip Edge
Drip edge is a metal flashing that helps to keep water away from the roof’s edges and into the gutters. Install drip edge along the eaves of your roof before adding shingles. Make sure to overlap each piece by around 2 inches.
Step 4: Locating the Starter Strip
The starter strip is a row of shingles that goes along the bottom edge of your roof. It helps to secure and seal the first layer of shingles. Use a chalk line to mark the starter strip’s position, ensuring it’s straight. Then, nail the starter strip in place.
Nailing Shingles
A. Choosing the Right Nails
As mentioned earlier, roofing nails come in various sizes, so it’s essential to choose the right size for your shingles. Generally, you’ll want to use nails that are around 1 inch longer than the shingle thickness. This will ensure the nails penetrate deep enough into the roof deck for a secure hold.
B. Setting the Nailing Pattern
The standard nailing pattern for asphalt shingles is four nails per shingle, with one nail in each corner. However, it’s best to check the manufacturer’s instructions for specific guidelines for your shingles. Use a roofing square to mark the nailing pattern on each shingle before installation.
C. Hand-Nailing vs. Using a Nail Gun
While some people prefer hand-nailing shingles for more control, others may opt for using a nail gun for faster installation. Whichever method you choose, make sure to follow proper safety precautions and nailing guidelines.
D. Nailing Techniques
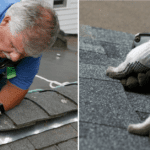
To properly nail shingles, you’ll want to place the nails along the nailing strip (the area without adhesive) of each shingle. Drive the nails in at a slight angle and make sure they’re flush against the shingle’s surface. Avoid overdriving the nails, as this can damage the shingles. And remember to follow the nailing pattern for each shingle.
5 Easy Step-by-Step Guide to Installing Shingles to Roof
Step 1: Starting at the Eaves
Begin installing shingles at the eaves (the bottom edge of your roof). Place the first row of shingles along the starter strip, overlapping each by around 1/2 inch. Make sure to follow the nailing pattern for each shingle.
Step 2: Nailing Pattern and Placement
Continue installing shingles along the eaves, making sure to follow the nailing pattern for each row. As you move up the roof, overlap each row by around 6 inches. When reaching the top of the roof, cut any excess shingle material if needed.
Step 3: Overlapping Shingles
When installing shingles, it’s essential to overlap each row to ensure proper water drainage and protection. The amount of overlap will depend on the type of shingle you’re using, so be sure to refer to manufacturer instructions.
Step 4: Cutting and Fitting Shingles
At some point, you may need to cut shingles to fit around roof vents, chimneys, or other obstacles. Use a utility knife to make precise cuts and ensure proper fitment.
Step 5: Finishing Touches
After all shingles have been installed, add ridge caps to the roof’s peaks for extra protection and aesthetics. These are specially designed shingles that go along the top edge of the roof. Use enough roofing cement or adhesive to secure them in place.
Ventilation and Flashing Considerations
Proper ventilation and flashing are essential for a roofing system’s long-term performance. Be sure to install or check existing ventilation systems and flashing before installing shingles. Adequate ventilation helps to regulate temperature and moisture levels in the attic, while flashing protects against water intrusion at critical areas such as chimneys, skylights, and valleys.
Special Roofing Elements
- Hip and Ridge Shingles – These are specially designed shingles that go along the roof’s hips and ridges, providing extra protection and a finished look.
- Valleys and Roof Penetrations – Valleys are the areas where two roof planes intersect, while penetrations refer to areas where objects such as chimneys or vents penetrate through the roof. These areas require special attention and proper flashing installation.
- Roofing Sealants and Adhesives – In addition to using roofing nails, it’s essential to seal shingles in critical areas with roofing sealant or adhesive for added protection against water intrusion. Refer to manufacturer instructions for proper application and placement.
Completing the Roofing Project
After all shingles have been installed and final touches have been made, it’s important to perform a thorough inspection of the roof and surrounding areas. Look for any loose or missing shingles, make sure the flashing is secure, and check for proper water drainage. And don’t forget to clean up any debris from the roofing project to ensure a safe and tidy work area. With proper installation and maintenance, your new roof can provide protection and peace of mind for years to come. Keep these tips in mind, and consult a professional if you have any questions or concerns about your roofing project.
Quality Assurance and Inspection
Once the roofing project is complete, it’s important to perform a quality assurance and inspection to ensure everything was installed properly. This includes checking for proper nailing patterns, shingle placement and overlap, flashing installation, and ventilation systems. It’s also beneficial to have a professional inspector or contractor perform an annual roof inspection to catch any potential issues early on and prolong the life of your roof. With proper installation and maintenance, your new roof can provide protection and peace of mind for years to come. Keep these tips in mind, and consult a professional if you have any questions or concerns about your roofing project.
FAQs for Properly Nailing Shingles to a Roof
How long does a typical roofing project take?
The timeline for a roofing project can vary depending on factors such as the size of the roof, weather conditions, and the complexity of the installation. It’s best to consult with a professional contractor for an estimated time frame.
What is the average lifespan of asphalt shingles?
The average lifespan of asphalt shingles can range from 15-30 years, depending on factors such as the quality of materials used, climate conditions, and proper installation and maintenance.
Can I install new shingles over existing ones?
It’s not recommended to install new shingles over existing ones, as this can lead to potential issues and decrease the new shingles’ lifespan. It’s best to remove the old shingles before installing new ones.
How do I know if my roof needs repairs or replacement?
Signs that your roof may need repairs or replacement include missing, cracked, or curling shingles, water stains on ceilings or walls, and visible damage such as mold or rot. If you’re unsure, it’s best to consult with a professional for an inspection and recommendation.
Conclusion
Having concluded this blog post, you are now better equipped to select the appropriate shingles for your roof. You have gained knowledge about the necessary tools, materials, safety precautions, roof surface preparation, step-by-step nailing and installation guide, ventilation and flashing considerations, as well as the required special roofing elements. Quality assurance and inspections are also vital aspects to consider. Before embarking on your DIY project or hiring professionals for assistance, ensure that you abide by local laws governing roof installations and engage certified experts when necessary.
Exploring various options and brands can be beneficial in choosing the best products that align with your budget and desired outcome. Remember, prioritizing safety is paramount, so always wear appropriate gear when undertaking any roof or building-related project. Now that you have armed yourself with all the essential knowledge, it’s time to take action and get started!



Everyone loves what you guys tend to be up too. This kind of clever work and exposure! Keep up the good works guys I’ve added you guys to my own blogroll.
F*ckin’ awesome things here. I’m very glad to see your article. Thanks a lot and i’m looking forward to contact you. Will you kindly drop me a mail?