

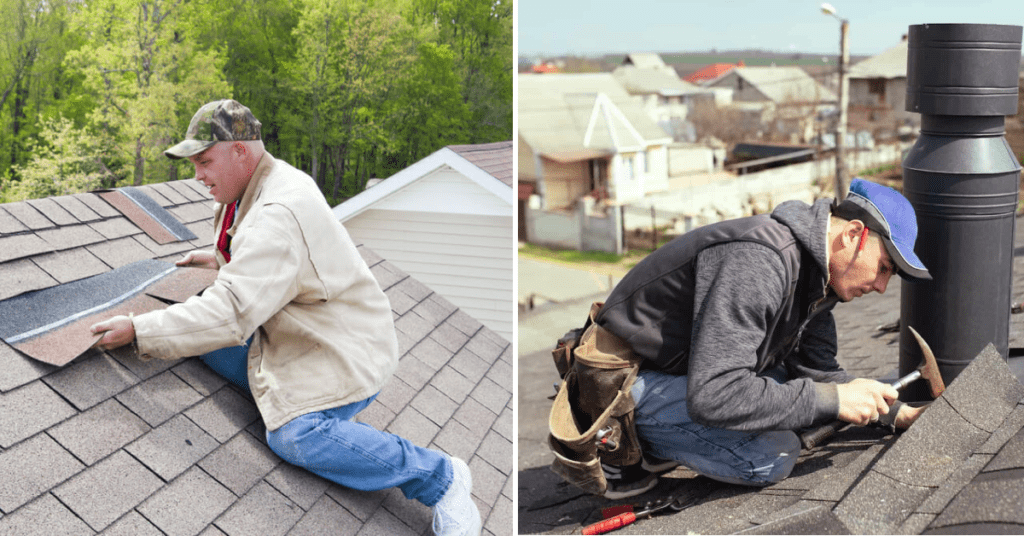
How to Repair a Nail Hole in Roof Shingles
Do you have a leaky roof caused by a nail hole in your shingles? Are you concerned that the only solution is to hire an expensive contractor for repairs or even worse, replace the entire roof? The good news is, you don’t necessarily need to invest so much money and time. In fact, it’s possible to repair this kind of damage on your own and without any prior experience! In this blog post, we will walk through the easy and cost-effective steps for how to repair a nail hole in roof shingles yourself. So get ready to fix up your roof quickly and inexpensively right away!
Identifying Nail Holes in Roof Shingles
Before we jump into the repair process, it’s important to first identify the nail hole in your shingles. This may seem obvious, but sometimes a small hole can easily go unnoticed and lead to bigger problems down the line. Start by examining your roof for any visible signs of damage, such as missing or cracked shingles, water stains on interior walls or ceilings, or any signs of leaking. Once you have located the general area, search for a small hole that could be the source of the leak. This can often be found where two shingles overlap or at the bottom edge of a shingle.
Gather the Necessary Tools and Materials
To properly repair a nail hole in your roof shingles, you will need the following tools and materials:
- A ladder
- Safety equipment such as gloves, goggles, and non-slip shoes
- Roofing tar or sealant
- A putty knife or similar tool for applying tar/sealant
- Spare shingles (optional)
- Hammer and nails (optional)
It’s important to have all of these items on hand before beginning the repair process. This will save you time and ensure that the job is done efficiently.
Safety Precautions
Before climbing up on your roof, be sure to take all necessary safety precautions. This includes wearing appropriate clothing and gear, such as gloves, goggles, and non-slip shoes. It’s also important to use a sturdy ladder that is properly secured and placed on level ground. If you are uncomfortable with heights or do not have experience working on roofs, it may be best to hire a professional for the job.
3 Easy Methods for Repairing Nail Holes in Roof Shingles
Method 1: Using Roofing Cement or Sealant
One of the simplest and most effective methods for repairing a nail hole in roof shingles is by using roofing cement or sealant. This versatile solution, readily available at most hardware stores, offers a convenient and straightforward approach to fixing the issue. Equipped with an easy-to-use tube, the roofing cement or sealant allows for precise application directly onto the nail hole. It is crucial to ensure complete coverage to effectively seal the hole.
To achieve a seamless finish, employ a putty knife or a similar tool to evenly spread the sealant and create a smooth surface. Once applied, allow sufficient time for the sealant to dry thoroughly before conducting a meticulous inspection to verify the absence of any remaining leaks.
Method 2: Applying Roof Patch or Roofing Tape
For larger or more stubborn nail holes, you may want to use a roof patch or roofing tape. These products come in various sizes and are designed specifically for repairing damaged shingles. Simply cut the patch or tape to fit the size of the hole and apply it directly over the area. Use a putty knife or your fingers to smooth out any wrinkles or air bubbles. Allow the patch or tape to dry completely before inspecting for any remaining leaks.
Method 3: Replacing the Damaged Shingle
If the nail hole is too large or damaged for repair, you may need to replace the entire shingle. To do this, carefully remove the damaged shingle by lifting the edges and removing any nails holding it in place. Then, slide a new shingle into position and secure it with roofing nails. Use roofing tar or sealant around the edges of the new shingle for added protection against leaks.
Step-by-Step Instructions for Each Repair Method
For a more detailed guide on each repair method, please refer to the following instructions:
Using Roofing Cement or Sealant:
- Clean the area around the nail hole with a brush or cloth.
- Apply roofing cement or sealant directly onto the hole.
- Use a putty knife or similar tool to spread the product evenly and create a smooth surface.
- Allow the product to dry completely before inspecting for any remaining leaks.
Applying Roof Patch or Roofing Tape:
- Clean the area around the nail hole with a brush or cloth.
- Cut the patch or tape to fit the size of the hole.
- Apply directly over the damaged area, smoothing out any wrinkles or air bubbles.
- Allow the patch or tape to dry completely before inspecting for any remaining leaks.
Replacing the Damaged Shingle:
- Carefully lift the edges of the damaged shingle and remove any nails holding it in place.
- Slide a new shingle into position and secure it with roofing nails.
- Use roofing tar or sealant around the edges for added protection against leaks.
Inspecting and Testing the Repair
Once you have completed the repair, it is crucial to conduct a thorough inspection and testing to ensure that there are no remaining leaks. Take a garden hose or a spray bottle and simulate rain by spraying water on the repaired area. Carefully examine the area around the repaired nail hole for any signs of leaking. Look for dripping water, dampness, or discoloration that may indicate a leak.
If you happen to notice any issues or signs of leaking, it is important to take immediate action. You can either repeat the repair process, ensuring that you address any potential gaps or weaknesses, or seek professional assistance from a qualified repair specialist. They will be able to provide further guidance and ensure that the repair is properly addressed to prevent any future leaks or damage.
By investing time and effort into thorough inspection and testing, you can have peace of mind knowing that your repair is reliable and effective, providing long-lasting protection against leaks and potential water damage.
Tips and Tricks to Repair a Nail Hole in Roof Shingles
- Always work on a dry roof. If the area is wet, it will be challenging to apply any products effectively.
- When using roofing cement or sealant, make sure to cover the entire nail hole for optimal sealing and protection against leaks.
- For larger holes or stubborn leaks, consider using a patch or tape specifically designed for repairing shingles.
- To prevent future nail holes, use roofing nails with a rubber or neoprene washer to provide an extra layer of protection against water penetration.
- Regularly inspect your roof for any signs of damage or wear and tear, including loose shingles, cracks, or missing tiles. Addressing these issues promptly can help prevent further damage and costly repairs in the future.
By following these tips and utilizing the simple yet effective repair methods outlined above, you can easily address nail holes in your roof shingles and ensure that your home is properly protected against potential leaks and water damage.
Preventive Measures to Avoid Future Nail Holes
While it is impossible to prevent all potential nail holes in your roof shingles, there are some preventive measures you can take to reduce the risk:
- Use shorter roofing nails or a different type of fastener that will not penetrate through the shingle.
- Place a small amount of sealant over any exposed nail heads on your roof.
- Regularly inspect and maintain your roof to catch any potential issues before they become more serious.
By taking these simple precautions, you can help protect your roof from future nail holes and minimize the need for repairs in the long run. Remember, prevention is key when it comes to maintaining a durable and reliable roof for your home.
FAQs on Repairing Nail Holes in Roof Shingles
Can I use regular caulk or sealant to repair a nail hole in my roof shingles?
No, it is not recommended to use regular caulk or sealant as they are not designed for repairing roofing materials. It is best to use products specifically made for patching and sealing roof shingles.
How long will the repair last?
The longevity of the repair will depend on various factors, such as the severity of the damage and the quality of materials used. However, with proper application and maintenance, a repair should last for several years.
Can I do this repair myself or should I hire a professional?
It is possible to do this repair yourself if you have some DIY experience and feel confident doing so. However, if you are unsure or uncomfortable with the repair process, it is best to seek professional help to ensure that the repair is done correctly and effectively.
Conclusion
In conclusion, identifying nail holes in roof shingles can be tricky, however, armed with the right tools, materials and safety precautions, you’ll be able to complete this task accurately and safely. Don’t forget to always put safety first so you can stay protected while fixing any roof problems. After you’re done repairing the nail holes in your roof shingles, it is recommended that you thoroughly check the area for any discrepancies or further damage that might need to be repaired as well.
Following these simple steps will ensure that your repair job is successful and weather-worthy. Now that you’ve learned how to properly identify and repair a nail hole in roof shingles, why not give it a try yourself? good luck!


Great post. I was checking constantly this blog and I am impressed! Very helpful info specifically the last part 🙂 I care for such info a lot. I was looking for this certain info for a very long time. Thank you and good luck.
very nice put up, i certainly love this web site, keep on it