How to Test ECU With Multimeter
Modern vehicles are equipped with an impressive array of control modules that manage various systems. One of the most important of these is the Engine Control Unit, or ECU. The ECU is akin to the brain of your car, as it controls the fuel injection system, ignition timing, idle speed control system, air conditioning, and several other elements critical to your vehicle’s performance and emissions.
Testing the ECU is not simply about finding faults, although that can be a crucial part of the process. It’s about understanding your car’s systems, ensuring they are running efficiently, and diagnosing problems before they become major issues. With a few handy tools and some knowledge, you can perform tests that professional mechanics use to evaluate the health of the ECU.
In this detailed guide, We will walk you through the step-by-step process of how to test ECU with multimeter. From understanding the basics to advanced techniques, we’ll cover everything you need to know to ensure your vehicle’s ECU is in top-notch condition
Essential Tools for Testing the ECU
Before you begin, you’ll need the following tools:
- A digital multimeter with the ability to measure voltage, resistance, and continuity.
- Vehicle service manual or wiring diagrams.
- Safety gear such as gloves and eye protection.
- Diagnostic trouble code reader (OBD-II scanner).
- Alligator clips or back probes for easier connection during testing.
Preparing for ECU Testing
Testing the ECU requires several preparatory steps to ensure a safe and effective process.
- Safety First: Always disconnect the battery before working on the ECU or any electrical system to prevent injury or damage.
- Knowledge is Power: Familiarize yourself with your vehicle’s ECU location and the specific tests you’ll be performing.
- Documentation: Print out relevant wiring diagrams and have a notebook ready to record your findings.
Prepare the Multimeter
The multimeter is your indispensable tool for testing the ECU. Here’s a quick primer on how to use it:
- Select the Correct Function: The multimeter should have settings for voltage (V), resistance (Ω), and ideally, continuity (a sound or light that indicates a complete circuit).
- Set the Range: For voltage or resistance testing, set the multimeter to the appropriate range (e.g., 20 volts for testing a 12V car battery, or 200 ohms to measure sensor resistance).
- Polarity Matters: Ensure you connect the multimeter probes to the correct terminals red typically means positive, while black is negative or ground.
Testing ECU for Power
The first step is to test whether the ECU is receiving power.
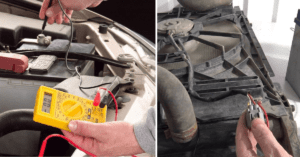
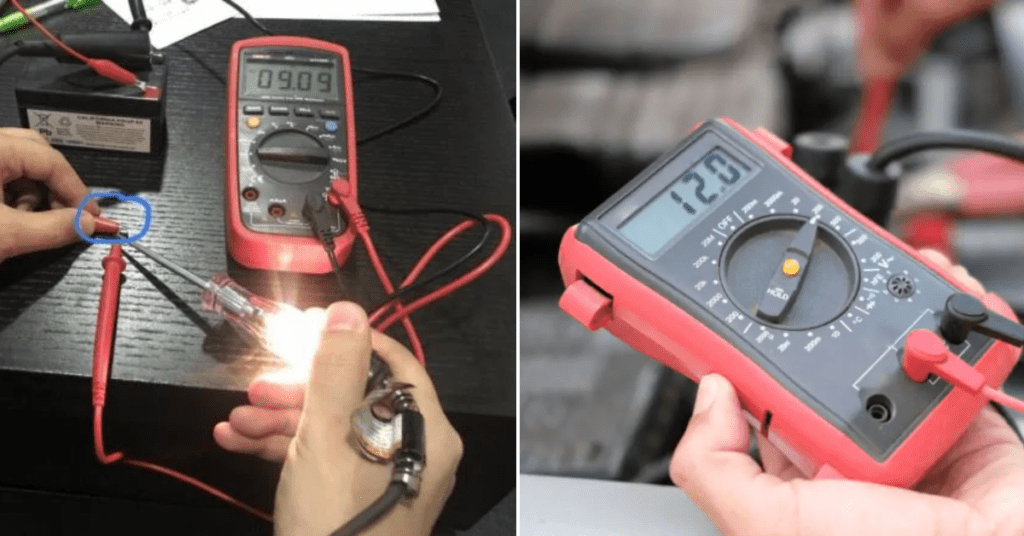
- Battery Voltage: With the battery reconnected, set the multimeter to measure DC voltage. Place the red probe on the ECU’s power input, and the black probe on a known good ground. It should read at least 12 volts.
- Ignition Switch Position: Repeat the test with the ignition on. You might have a separate power input that’s only active when the key is in the ON or RUN position.
- Battery Draw and Voltage Drop Tests: Perform a voltage drop test across connections, fuses, and wiring to ensure no excessive resistance is causing a loss of power.
Checking ECU Grounds
Equally important is ensuring the ECU has a clean, strong ground connection.
- Resistance Readings: Switch to the resistance (Ω) setting on the multimeter. One probe goes to the ECU ground terminal, the other to the battery negative post. Typically, you want to see only a few ohms of resistance.
- Physical Inspection: Check the physical condition of the ground wires and terminals. Corrosion or breakage can cause significant issues.
- Voltage Drop Tests: Use the multimeter to measure voltage drop across the ground connection under load to detect excessive resistance.
Testing ECU Sensors
You can conduct several sensor tests directly from the ECU’s wiring harness.
- Resistance and Voltage Tests: Sensors like the throttle position sensor or the oxygen sensor can be tested for resistance or voltage with the multimeter set to the appropriate ranges.
- Voltage Stability: While the engine is running, test for a steady voltage reading from the sensors. A fluctuating or unreliable signal can cause ECU problems.
- Warm-up Sensors: Some sensors, like the coolant temperature sensor, have different resistance values when cold and when hot. Check the service manual for specific values.
Diagnosing ECU Communication Problems
If the ECU can’t communicate with other modules or sensors, there may be a network or wiring issue.
- CAN Bus or Serial Communication: Use the multimeter’s continuity test to ensure that the communication lines are not open or shorted.
- Pin-to-Pin Testing: Compare resistance readings for each module pin and wire to see if they match the expected values.
- Powerline Communication: In some systems, communication signals can piggyback on power lines. Use the multimeter to test these with the engine running.
Testing ECU Inputs and Outputs
ECUs take input from various sensors and produce outputs to control systems. Testing these can be complex and involve multiple steps.
- Output Operational Checks: With the engine running, test outputs by measuring voltage or current across the output terminals. This should match expected patterns outlined in the service manual.
- Load Testing Outputs: Use a test light or other load to test the ECU’s ability to power devices. High current draw devices like radiator fans or fuel pumps are good test loads.
- Input Signal Verification: Check that input signals to the ECU are within expected ranges. Deviations can indicate a faulty sensor or wiring issue.
Interpreting Multimeter Readings
This can be the most challenging part of ECU testing, as it requires a strong understanding of what ‘normal’ looks like for your vehicle.
- Know the Norm: Service manuals often provide acceptable ranges for things like sensor resistance or voltage readings.
- Comparative Analysis: If a reading seems off, comparing it with readings from the same or similar components can help isolate the problem.
- Record and Report: Keep detailed records of your tests and findings. If a reading is borderline or intermittent, this log can be invaluable.
Troubleshooting ECU Problems
Once you’ve identified issues, it’s time to troubleshoot and potentially repair or replace the ECU.
- Grounding Issues: Clean or repair grounding connections. These can lead to a myriad of problems throughout the vehicle.
- Component Tests: Often, a sensor or actuator can fail and erroneously report a condition to the ECU. Test and inspect these.
- ECU Diagnostics: Some ECUs have built-in diagnostic modes that can help pinpoint issues. Use your service manual to access these features.
Safety Precautions and Best Practices
Working on electronic components in your car requires a cautious approach.
- Disconnect the Battery: Safety 101 when working with anything electrical in a vehicle.
- Work in a Well-Ventilated Area: Car exhaust is dangerous to your health.
- Avoid Static Electricity: Touch a grounded metal surface before working on the ECU to discharge any static electricity.
Tips for Successful ECU Testing
Experience can make all the difference, but here are some general tips for smoother testing:
- Be Methodical: Approach each test with the same attention to detail. A systematic method will help you avoid missing anything important.
- Use Alligator Clips: For hard-to-reach or awkwardly placed terminals, alligator clips can make the job much easier.
- Take Your Time: Rushing can lead to mistakes or missed issues. Plan to spend a good amount of time on this project.
Advanced ECU Testing Techniques
For enthusiasts looking to expand their knowledge, there are more advanced techniques to explore:
- Oscilloscope Testing: An oscilloscope can provide detailed, real-time measurements of sensors, actuators, and the ECU’s internal functioning.
- EPROM Readers: With the right equipment and knowledge, you can read and possibly modify the ECU’s programming.
- Temperature Testing: Some problems are temperature-dependent. Using a heat gun or cooling spray during testing can reveal issues that wouldn’t show up at a stable, “comfortable” temperature.
Maintain a Healthy ECU
Regular maintenance and careful use can extend the life of your ECU:
- Avoid Moisture and Corrosion: Keep connections clean and dry to prevent damage.
- Regular Resets: Occasionally resetting the ECU can clear minor issues. Refer to your service manual for the procedure.
- Firmware Updates: If available, update your ECU’s firmware to the latest version to benefit from bug fixes and optimizations.
FAQs on Testing an ECU Using a Multimeter
Can I test my car’s ECU without a multimeter?
While a multimeter is the most versatile and comprehensive tool for testing the ECU, you might be able to perform some tests with other tools or even without them, such as using a test light or diagnostic trouble code reader.
What are the signs of a failing ECU?
Symptoms like engine misfires, stalling, a noticeable loss of power, or the vehicle not starting at all can be indicators of ECU problems.
How do I know if my ECU is bad?
If you’ve exhausted all other diagnosis avenues and still have erratic vehicle behavior, a bad ECU could be a possible cause. More conclusive testing can be performed at a professional service center.
Can you repair ECM?
Yes, it is possible to repair an ECM (Engine Control Module) in certain cases. An ECM is a vital component of modern vehicles, as it controls the engine’s functions and ensures optimal performance. However, like any other electronic device, an ECM can malfunction or fail due to various reasons.
Conclusion
Understanding how to test your car’s Engine Control Unit is an essential part of being a knowledgeable car owner or enthusiast. It can allow you to diagnose and potentially fix issues that may arise with your vehicle, maintain its performance, and even unlock new potential through tuning and modifications.
Remember, patience and a methodical approach will serve you well in ECU testing. And always prioritize your safety when working with electrical components in your vehicle.
By following the comprehensive guide we’ve outlined, you’re well on your way to becoming adept at testing your car’s ECU with a multimeter. With practice and experience, you’ll gain the confidence to tackle more complex diagnostic tasks and keep your car running in peak condition. Happy testing!