How to Test High Limit Switch With a Multimeter
Understanding and being able to diagnose issues with the high limit switch in your HVAC system can mean the difference between a cozy home and an unexpected breakdown in the middle of winter. Whether you’re an HVAC technician, a dedicated homeowner, or simply a DIY enthusiast looking to expand your knowledge, this guide will walk you through every step of professionally testing a high limit switch. In this article, we will cover the importance of this vital component, How to test high limit switch with a multimeter, troubleshooting, and when to seek expert help. By the end, you’ll be equipped to handle common high limit switch issues and maintain your system’s efficiency.
The Crucial Role of the High Limit Switch
Before we jump into testing procedures, it’s essential to understand what a high limit switch is and why it’s so important. In HVAC systems, this safety device measures the temperature of the heat exchanger. If it reaches a dangerous level, the high limit switch shuts down the burner or heating element. This prevents overheating and reduces the risk of a fire, making it a critical part of your system’s safety features.
When the high limit switch fails, it usually indicates a problem with your system’s airflow or a defective switch, allowing the heat exchanger to reach unsafe temperatures. Regular inspections and knowing how to test the high limit switch can save you from potential dangers and expensive system repairs.
Safety First High Limit Switch and You
Testing the high limit switch requires working with a live HVAC system and potentially hazardous electrical components. Safety should always be your top priority. Here are some cardinal rules to follow:
- Turn off the power supply to the HVAC system at the main electrical panel.
- Wait for at least 10-15 minutes for the system to cool down to avoid any risk of burns.
- Always use tools with insulated handles and, if possible, non-contact voltage testers.
- If you’re not absolutely certain what you’re doing, do not proceed. There’s no shame in calling a professional.
Always keep these best practices in mind throughout the testing process to protect yourself and your HVAC system.
Tools Needed for the Test
To proceed with testing the high limit switch, you’ll need a few tools and items:
- Multimeter (digital or analog for checking voltage and continuity)
- Screwdrivers (flathead and Phillips)
- Electrical tape
- Ohm’s Law wheel (for more advanced troubleshooting)
- Work gloves for non-conductive protection
- Notepad and pen for recording measurements
Gather these essentials and set up in a well-lit, ventilated area to ensure all tests can be conducted with precision and safety.
Preparing for the Test
With your tools at the ready, it’s time to get your HVAC system ready for the high limit switch test:
- Turn off the power to the system. Do this at the main electrical panel to prevent any electrical shocks during testing.
- Identify the location of the high limit switch in your system. It’s usually mounted on the furnace’s housing or in the ductwork near the heat exchanger.
- Carefully remove the cover of the furnace or access panel to reach the high limit switch. Take note of its position and be prepared to reinstall the panel securely once you’ve completed the test.
4 Easy Procedure for Testing
Now, we’ll go through the exact process of testing the high limit switch. Remember, accuracy, and patience are key to get reliable results.
Step 1: Visual Inspection
Start with a visual inspection of the high limit switch for any signs of damage or faults. You’re looking for corrosion, rust, burn marks, or frayed wires. If you spot any of these issues, the high limit switch may need to be replaced.
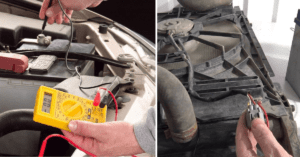
Step 2: Setting Up the Multimeter
Set your multimeter to the Ohms setting. This will allow you to check for continuity in the switch, verifying that the electrical current can pass through it unhindered. Be sure to zero out the leads if necessary to achieve accurate readings.
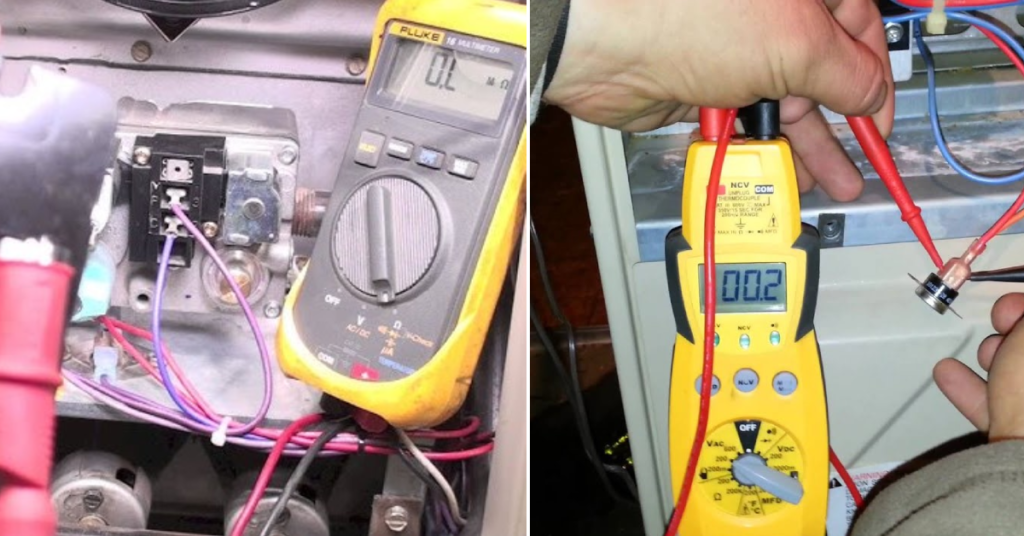
Step 3: Measuring Continuity
With the HVAC system still powered off, disconnect the wires from the high limit switch leads. Connect the multimeter’s leads to the terminals of the switch and check for continuity. If the switch has continuity, the resistance should show zero ohms. Any reading other than zero indicates that the switch is open, and you may need to replace it.
Step 4: Voltage Testing
Next, set your multimeter to the voltage setting. Turn on the power to the HVAC system (ensuring all safety precautions are followed) and check the voltage across the switch when it’s closed (i.e., when the system is operational). You should see the system voltage if the switch is working correctly.
Conducting the Test
Now that you’re familiar with the steps, it’s time to perform the test:
- Use the screwdrivers to disconnect the leads from the high limit switch.
- With the multimeter set to the appropriate setting, touch the probes to the high limit switch’s connectors and note the readings.
- Turn on the HVAC system and monitor the multimeter for any changes. If there’s a drop or no reading, the switch is likely malfunctioning.
Troubleshooting Common Issue and Problem-Solving
If the high limit switch appears faulty, it’s time to troubleshoot further. The problem might not be with the switch itself, but with the system that’s causing it to trip. Here are a few possible issues and how to address them:
- Dirty Air Filters: Replace or clean dirty air filters as needed. They are the most common cause of a tripped high limit switch.
- Blocked or Leaky Ducts: Investigate for blockages or leaks in your system’s ductwork.
- Malfunctioning Blower Motor: If the blower motor isn’t running efficiently, it can lead to overheating. Check the motor for signs of wear and tear and verify it’s operating within the manufacturer’s settings.
When the High Limit Switch Fails
If testing confirms that the high limit switch is the culprit, don’t panic. Replacing the high limit switch is a fairly straightforward procedure:
- Purchase a replacement switch from your local HVAC parts supplier or online.
- Turn off the power to your HVAC system.
- Discharge any residual voltage and ground the system.
- Carefully remove the old high limit switch and replace it with the new one, reconnecting the wires exactly as they were.
After replacing the switch, reassemble the system, restore power, and run the system to verify that the issue has been resolved.
Preventive Maintenance Tips
Once you’ve tested or replaced the high limit switch, consider these preventive maintenance tips to avoid future issues:
- Schedule regular professional inspections of your HVAC system, including the high limit switch.
- Change air filters as recommended by the manufacturer.
- Keep the area around your HVAC equipment clean and free from obstructions to ensure proper airflow.
When to Call a Professional
Sometimes, despite your best efforts, HVAC repair is best left to the professionals. Call in an expert if:
- You feel uncomfortable or unsure about any aspect of the diagnosis or repair process.
- Simple fixes don’t solve the high limit switch issue, indicating a more complex problem.
- You’re faced with an emergency situation and need immediate assistance.
Don’t hesitate to reach out to an HVAC technician. They have the training, experience, and tools to handle the job safely and effectively.
FAQs
Can I bypass the high limit switch?
Bypassing the high limit switch is for testing purposes only and should never be done as a permanent solution. It endangers the system’s safe operation.
Why did my high limit switch fail?
Common reasons for high limit switch failures include overheating due to restricted airflow or a malfunctioning heating element.
My high limit switch tests fine, but my furnace still isn’t working. What could be the problem?
If your high limit switch is in working condition, the issue may lie with a different component, such as the thermostat, control board, or an electrical wiring problem.
How often should I test my high limit switch?
Although testing the high limit switch is a part of regular HVAC maintenance, the best practice is to have the entire system checked by a professional at least once a year.
Conclusion
Testing your high limit switch can be an illuminating process, offering insights into your HVAC system’s health and performance. By following the systematic approach outlined in this guide, you can ensure your tests are accurate and your system is safe. Remember, it’s always better to be proactive than to be left out in the cold with a malfunctioning furnace. With your newfound knowledge, you’re well on your way to mastering HVAC diagnostics and keeping your home or customers comfortable all year round.