

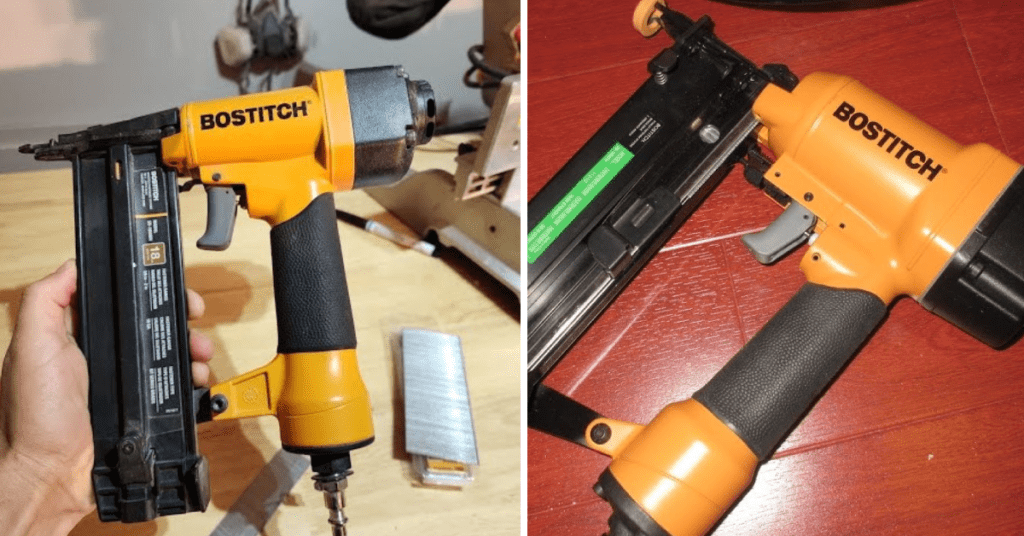
How to Load a Bostitch Nail Gun
If you’re working on a home improvement project and need to get the job done with precision and speed, then you’ll want to consider investing in a nail gun. A nail gun is a powerful tool that will save you hours of tedious hammering work, but only if it’s used correctly. In this blog post, we’ll go through how to load a Bostitch Nail Gun safely so that you can use it for a variety of projects around the house or at work.
We’ll delve into how to assemble each piece of the Bostitch Nail Gun, how much weight can be accommodated by the different varieties available today. With this information in hand, no DIY project will be beyond your reach!
Different types of Bostitch Nail Guns
The first step before loading your Bostitch Nail Gun is to understand the different types available in the market. Bostitch offers a wide range of nail guns, including framing nailers, finishing nailers, and brad nailers. Each type serves a specific purpose, so it’s crucial to choose the right one for your project.
- Framing Nailers: These nail guns are perfect for heavy-duty framing projects, such as building a deck or constructing a fence.
- Finishing Nailers: As the name suggests, these nail guns are used for finishing work, such as attaching trim and molding.
- Brad Nailers: This type of nail gun is ideal for smaller projects that require delicate precision, like installing cabinets or trim.
Key Components of a Bostitch Nail Gun
Before loading your nail gun, it’s essential to familiarize yourself with its key components. This will not only help you load the gun more efficiently but also ensure safe operation.
- Magazine: The magazine is where the nails are stored and fed into the firing mechanism.
- Firing Mechanism: This is what drives the nails into the material with force.
- Trigger: The trigger controls the firing mechanism and is usually located on the handle of the nail gun.
- Depth Adjustment: This feature allows you to control how deep the nails are driven into the material.
Assembling your Bostitch Nail Gun
Now that you understand the different types and key components of Bostitch Nail Guns, it’s time to assemble your specific model. Here are the general steps for assembling most Bostitch Nail Gun models:
- First, make sure the nail gun is disconnected from any power source.
- Open the magazine by pressing on the magazine release button and pulling down on the magazine cover.
- Slide the nails into the magazine, making sure they are all aligned and facing in the right direction.
- Close the magazine cover and lock it in place by pressing the release button again.
- Connect an air hose to your nail gun, ensuring that it’s securely attached.
- Turn on your compressor and adjust the pressure according to your project’s requirements.
- Test the nail gun by firing a few nails into scrap material to ensure everything is working correctly.
Safety Precautions Before Loading and Unloading
Before loading and unloading your Bostitch Nail Gun, it’s crucial to take some safety precautions. These include:
- Always wear safety glasses when operating the nail gun.
- Make sure no one is standing in front of or behind you while using the nail gun.
- Disconnect the air supply before loading or unloading nails.
- Keep your fingers off the trigger when not in use.
7 Easy Step-by-Step Guide to Loading a Bostitch Nail Gun
Step 1: Choosing the correct nails
Before loading your Bostitch Nail Gun, you’ll need to choose the right nails for your project. The correct size depends on your specific nail gun model, so always refer to the user manual or check with a professional if you’re unsure.
Step 2: Preparing the nail gun
Following the assembly steps above, make sure your nail gun is assembled correctly and that the compressor is connected and set to the correct pressure.
Step 3: Opening the magazine
To open the magazine, locate the magazine release button, typically located on the side or bottom of the magazine. Gently press the magazine release button and while holding it down, pull down the magazine cover. This will smoothly and effortlessly open the magazine, allowing you to access its contents with ease.
Step 4: Placing the nails
Place the nails into the magazine, ensuring that they are all aligned in the same direction and that the heads of the nails are facing out. Close the magazine cover by pulling it back up until it locks in place.
Step 5: Closing the magazine
Once the nails are in place, carefully and gradually close the magazine cover. Ensure that it is securely locked by firmly pressing the release button again. Take a moment to appreciate the satisfying click as the cover securely snaps into place, providing utmost protection to the contents inside. By following this simple yet crucial step, you can be confident that your magazine is securely closed and ready for safe storage or transport.
Step 6: Testing the nail gun
Before using the nail gun on your project, it’s essential to test it first. Fire a few nails into scrap material to ensure that everything is working correctly and that the nails are being driven to the desired depth.
Step 7: Adjusting nail depth if necessary
If the nails are not being driven to the desired depth, you can easily make adjustments using the depth adjustment feature on your nail gun. For specific instructions on how to adjust this feature, refer to your user manual. Rest assured, with this handy feature at your disposal, you’ll be able to achieve the perfect depth for your nails effortlessly.
You can also read How to Load a Ryobi Nail Gun.
Proper Storage for your Bostitch Nail Gun
Once you’ve completed your project and are ready to store your Bostitch Nail Gun, it’s crucial to do so properly. This will not only protect your nail gun from damage but also ensure its longevity.
- Always disconnect the air supply before storing the nail gun.
- Store the nail gun in a dry and clean environment, away from direct sunlight or extreme temperatures. This will prevent rust and corrosion.
- Make sure the nail gun is stored in a safe and secure location, out of reach of children or pets.
- Use a protective case or box to store your nail gun when not in use. This will provide an extra layer of protection against accidental damage.
Regular Maintenance Tips for Your Bostitch Nail Gun
To ensure your Bostitch Nail Gun continues to operate efficiently and last for many projects to come, it’s essential to perform regular maintenance. Here are a few tips to keep your nail gun in top condition:
- Regularly clean out any debris or dust from the magazine and firing mechanism.
- Lubricate the moving parts of the nail gun as recommended by the manufacturer.
- Inspect the air hoses and connections for any damage or wear and tear. Replace them if necessary.
- Store your nail gun properly when not in use, as described above.
By following these maintenance tips, you can ensure your Bostitch Nail Gun operates smoothly and efficiently every time you need it.
5 Tips to Avoid Jams in Your Nail Gun
Tip 1: Using the correct nails
Using the wrong size or type of nails can result in jams. Always refer to your user manual or consult with a professional to ensure you’re using the right nails for your project.
Tip 2: Not overloading the magazine
Loading too many nails into the magazine can cause jams, as there may not be enough room for the nails to move freely. Follow the recommended capacity outlined in your user manual.
Tip 3: Keeping the gun clean
Regularly cleaning your nail gun will help prevent debris build-up, which can cause jams. Use compressed air or a soft cloth to clean the magazine and other key components.
Tip 4: Using the right oil
Using the recommended oil for your nail gun is crucial, as using the wrong type can result in jams. Always follow the manufacturer’s instructions for lubrication.
Tip 5: Not forcing the gun
If you feel resistance while using the nail gun, do not force it. This could result in a jam or damage to your gun. Instead, stop and check for any obstructions or issues with the nails before continuing.
By following these safety precautions and proper loading, unloading, and maintenance techniques, you can confidently use your Bostitch Nail Gun to tackle all of your projects with ease.
FAQs on Bostitch Nail Guns
Do Bostitch nailers need oil?
Yes, Bostitch nailers require oil. Regular oiling of your Bostitch nailer is important to keep it functioning properly and extend its lifespan. The oil helps to lubricate the moving parts of the nailer and prevents rust and corrosion. It is recommended to oil your Bostitch nailer every 300 nails or every day of use. Be sure to use a high-quality air tool oil and follow the manufacturer’s instructions for oiling your specific model of Bostitch nailer.
Can I use Vaseline instead of nail oil?
No, it is not recommended to use Vaseline as a substitute for nail oil in your Bostitch nailer. Vaseline is a petroleum-based product that is not designed for use in air tools. It can cause damage to the internal components of your nailer and may cause it to malfunction. It is important to use a high-quality air tool oil that is specifically designed for use in nailers. This type of oil is formulated to withstand the high temperatures and pressures generated by air tools and will provide the necessary lubrication to keep your nailer functioning properly.
Can I use cooking oil for the nail gun?
No, it is not recommended to use cooking oil as a substitute for nail gun oil. Cooking oil is not designed for use in air tools and can cause damage to the internal components of your nail gun. Cooking oil is not formulated to withstand the high temperatures and pressures generated by air tools and will not provide the necessary lubrication to keep your nail gun functioning properly. It is important to use a high-quality air tool oil that is specifically designed for use in nail guns. This type of oil is formulated to withstand the high temperatures and pressures generated by air tools and will provide the necessary lubrication to keep your nail gun functioning properly.
Conclusion
In conclusion, choosing the right nail gun for your project is an important decision that requires some research. Bostitch offers many different types of nail guns to suit a variety of projects. Whereas framing nailers use larger nails for heavier jobs, brad and finish nailers are designed for finer trim and carpentry work.
Whatever your needs, it’s important to acquire the right tool for the job, as well as become familiar with key components of the nail guns like the safety tip and air fittings. Before loading one up, make sure you follow these simple safety precautions as well as learn how to properly load a Bostitch nail gun. Additionally, maintain basic maintenance and properly store your tool after use to avoid jams or other malfunctions in your equipment. Now you’re ready to tackle any project!


