How to Load a Ryobi Nail Gun
Looking to tackle a construction project with ease and efficiency? Or perhaps upgrading your home’s interior? Using a nail gun can save you time and energy, but only if used correctly. When it comes to industrial, construction, and everyday homeowner projects, Ryobi is the go-to brand. Mastering the art of loading a Ryobi Nail Gun is crucial for completing any job quickly.
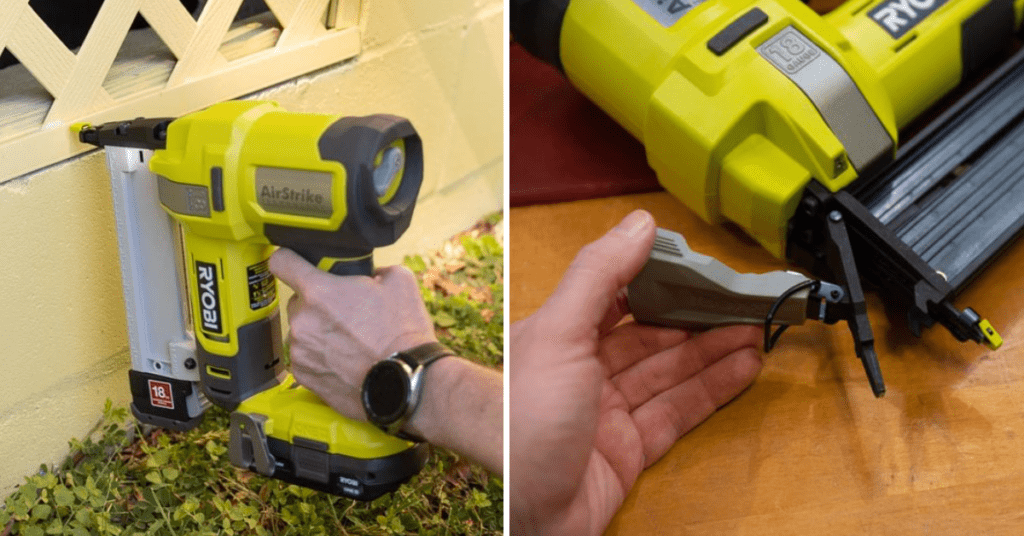
If you’re looking to learn how to load a Ryobi nail gun, then you’ve come to the right place. In this blog post, we’ll show you step-by-step how to load a Ryobi nail gun with ease. So let’s dive in and discover how to load your Ryobi nail gun with ease, so you can confidently tackle any project that comes your way.
Types of Ryobi Nail Guns
Before we dive into the loading process, it’s essential to know about the different types of Ryobi Nail Guns available on the market. This knowledge will ensure that you choose the right nail gun for your project.
- Pneumatic: These nail guns use compressed air to drive nails into surfaces. They are typically lightweight and easy to handle, making them a popular choice among DIY enthusiasts and professionals alike.
- Cordless: As the name suggests, these nail guns are powered by battery rather than air. They offer more portability and convenience but typically have less power compared to pneumatic options.
- Electric: These types of Ryobi Nail Guns use electricity to drive nails into surfaces. They provide consistent power and can handle larger projects with ease. However, they require a constant power source and are not as portable as cordless options.
Tools and Materials Needed for Loading a Ryobi Nail Gun
Before we begin, make sure you have the necessary tools and materials on hand to properly load your Ryobi nail gun.
- Ryobi Nail Gun (specific type depends on project)
- Nails compatible with your nail gun
- Safety goggles
- Compressed air (if using pneumatic)
- Battery or electrical outlet (if using cordless or electric)
- User manual (for specific instructions and safety precautions)
Safety Precautions for Loading a Ryobi Nail Gun
As with any power tool, it’s essential to take necessary safety precautions when loading a Ryobi nail gun. Follow these guidelines to ensure your safety and the proper functioning of your nail gun.
- Always wear safety goggles while working with a nail gun to protect your eyes from flying debris.
- Keep your fingers away from the trigger until ready to use.
- Disconnect the power source (battery or electrical outlet) and release all air pressure before loading.
- Never point the nail gun at anyone, even if it is not loaded. Treat it as if it is always loaded.
- Follow all instructions and safety precautions outlined in the user manual.
Identifying the Nail Type and Size
Before you load your Ryobi nail gun, it is crucial to identify the specific type and size of nails that it requires. This important information can typically be found in the user manual or on the packaging of your nail gun. By using the correct size and type of nails, you can ensure optimal performance and prevent any potential damage to your nail gun. Additionally, using the wrong size or type of nails not only poses a risk to your equipment but also compromises your safety. Therefore, taking the time to properly identify and use the appropriate nails is essential for a successful and safe nail gun operation.
6 Easy Step-by-Step Guide to Loading a Ryobi Nail Gun
Step 1: Preparing the Gun
If using a pneumatic nail gun, connect it to an air compressor and ensure the pressure is set to the manufacturer’s recommended level. For cordless or electric options, make sure the power source is connected and fully charged. Then, disconnect the power source and release all air pressure before beginning the loading process.
Step 2: Opening the Magazine
To locate the magazine on your nail gun, you can typically find it at the base of the tool. This is where the nails will be loaded for convenient and efficient use. Most Ryobi Nail Guns are equipped with a latch or release button that you can easily access to open the magazine, simplifying the process of loading nails and ensuring a smoother workflow.
Step 3: Loading the Nail Strip or Coil
Depending on your specific nail gun model, you will need to load either a strip or coil of nails. For strip-style magazines, slide the nail strip into the magazine so that the heads of the nails are facing down towards the base of the gun. For coil-style nail guns, similarly insert the coil but make sure it is securely placed in the magazine.
Step 4: Closing and Locking the Magazine
Once the nails are loaded into the magazine, it is crucial to close and lock it to ensure the prevention of any accidental firing. Take a moment to double-check that the magazine is securely locked before proceeding to the next step. This small but important detail will help maintain a safe working environment and minimize the risk of unintended nail discharge.
Step 5: Connecting the Power Source
For pneumatic nail guns, ensure that you reconnect the air compressor hose securely, making sure there are no leaks or loose connections. For cordless or electric options, double-check that the power source is properly connected and fully charged, so you can work efficiently without any interruptions.
Step 6: Testing the Nail Gun
With the magazine securely locked and the power source properly connected, it’s time to put the nail gun to the test. Take aim at the scrap wood and confidently fire a few nails, observing closely to ensure they are driven in securely and precisely. If needed, don’t hesitate to make any necessary adjustments to the nail gun’s settings, ensuring optimal performance and results.
Congratulations, you have successfully loaded your Ryobi Nail Gun!
Adjusting Nail Depth(if applicable)
Some Ryobi Nail Gun models, such as the Ryobi P320, come equipped with a nail depth adjustment feature. This feature allows you to easily customize the depth of the nails, making it incredibly useful when working on a variety of surfaces or materials. Whether you’re working on delicate trim or sturdy framing, having the ability to adjust the nail depth ensures that you achieve the perfect result every time. If your nail gun has this feature, don’t forget to consult the user manual for specific instructions on how to adjust it according to your project’s needs.
Using the Nail Gun Safely
Now that you have successfully loaded your Ryobi Nail Gun, it’s important to remember the safety precautions outlined earlier. Always treat the nail gun as if it is loaded and ready to fire, follow all instructions and safety guidelines in the user manual, and wear appropriate protective gear while operating. By prioritizing safety and proper usage, you can not only protect yourself but also prolong the lifespan of your nail gun.
Unloading the Nail Gun (if necessary)
When you have finished using your nail gun, it’s crucial to take the time to properly unload and store it. Disconnect the power source and release any remaining air pressure before removing the nails from the magazine. Dispose of any unused or damaged nails safely. Then, follow the manufacturer’s instructions for proper storage of your Ryobi Nail Gun, ensuring that it is securely stored and ready for your next project. Remember, proper care and maintenance can go a long way in keeping your nail gun functioning at its best.
Maintenance and Cleaning for Optimal Performance
Regular maintenance and cleaning are essential for ensuring the longevity and optimal performance of your Ryobi Nail Gun. After each use, take a moment to wipe down the nail gun with a clean cloth and remove any debris or dust buildup from the magazine, nosepiece, and other parts. Additionally, follow the manufacturer’s recommended schedule for lubrication and other maintenance tasks to keep your nail gun in top condition. By taking care of your tool, you can continue to enjoy its reliable and efficient performance for years to come.
Troubleshooting Common Issues for Loading Ryobi Nail Guns
If you encounter any difficulties while loading your Ryobi Nail Gun, there are a few common issues that could be the cause. First, make sure you are using the correct size and type of nails for your particular model. If they do not fit properly, it may cause jams or other malfunctions. Additionally, check for any obstructions or debris in the magazine or nosepiece that may be preventing the nails from loading properly. If the issue persists, consult the user manual for troubleshooting tips or contact Ryobi customer support for further assistance.
FAQs on Loading Ryobi Nail Guns
What type of nails should I use for my Ryobi Nail Gun?
It is important to use the correct size and type of nails recommended by the manufacturer for your specific nail gun model. This information can typically be found in the user manual or on the product packaging.
How do I know when it’s time to refill the nail magazine?
As you use your Ryobi Nail Gun, keep an eye on the number of nails that have been fired and make sure you have enough to complete your project. You can also physically check the magazine periodically to see if it needs to be refilled.
Can I use my Ryobi Nail Gun without a power source?
Some Ryobi Nail Gun models, such as the P320, are cordless and can be used without a power source. However, they still require proper nail loading and regular maintenance to ensure optimal performance.
What should I do if my nail gun jams while loading?
If you encounter a jam while loading your Ryobi Nail Gun, stop immediately and follow the manufacturer’s instructions for clearing jams. Do not try to force anything or use excessive pressure, as this could damage your tool.
How often should I lubricate my Ryobi Nail Gun?
Follow the manufacturer’s recommended schedule for lubrication, but also pay attention to how frequently you use your nail gun and in what conditions. If you are using it frequently or in harsh environments, you may need to lubricate more often. Otherwise, once every few months should suffice.
Conclusion
In conclusion, using a Ryobi nail gun is easy with the right knowledge and safety precautions in place. From identifying the type and size of nails to loading and adjusting them, it’s important to arm yourself with the necessary information before you begin your DIY project. Plus, taking steps to prevent injury is key remember to wear safety glasses when using any tool. And once you’re done, don’t forget to unload your nail gun, maintain it routinely, and clean it after every use. Now that you have all the information you need about these tools, nothing is holding you back, it’s time to get started on those home improvement projects!
