How to Plumb an Air Compressor Effectively
Do you have an air compressor in your home or garage? If so, then chances are that it requires the occasional plumbing job to keep it running smoothly. Plumbing an air compressor may seem like a daunting task especially if you lack experience with DIY projects but we’re here to show you that with just a few simple steps, anyone can plumb their air compressor!
We’ll provide all of the necessary basics and walk you through each step so there’s no need to worry about any costly repairs or mishaps along the way. So stick around and let us guide you on your journey toward becoming an expert in plumbing air compressors!
Why Proper Plumbing is Essential for an Air Compressor
When it comes to using an air compressor, proper plumbing is key for optimal performance. Without it, you may experience a pressure drop or even air leaks both of which can severely impact productivity. Proper plumbing ensures that the air compressor is receiving the proper amount of airflow and pressure, which in turn helps it to function efficiently. It also helps to extend the life of the compressor and reduce maintenance needs. Investing in the right plumbing components and ensuring that they are installed correctly will not only save you time and money but will also ensure that your air compressor is running at its best. With proper plumbing, you can tackle any project with ease and confidence.
Tools Needed for Plumbing an Air Compressor
Before we dive into the steps, it’s important to have all the necessary tools on hand. Here’s a list of items you’ll need for the job:
- Pipe cutter or hacksaw
- Deburring tool
- Teflon tape
- Adjustable wrenches
- Pliers
- Air compressor fittings (such as connectors, elbows, tees, and valves)
- Pipe wrench
- Thread sealant or pipe compound
- Pressure gauge
With these tools in your arsenal, you’ll be able to tackle any air compressor plumbing project with confidence.
6 Easy Step-by-step Guide to Plumb an Air Compressor
Step 1: Preparation
- Choose the location – Before you start installing your air compressor, choose a suitable location for it. Make sure it is away from any sources of heat or moisture and has enough space for proper ventilation.
- Gather materials – Once you have chosen the location, gather all necessary materials and tools before beginning the installation process.
Step 2: Understanding Your Air Compressor’s Components
- Air outlet – This is where the compressed air will be released from. It can usually be found at the top or side of the compressor.
- Pressure switch – This component controls when the compressor turns on and off based on predetermined pressure levels.
- Tank drain valve – Located at the bottom of the tank, this valve is used to remove excess water and debris from the tank.
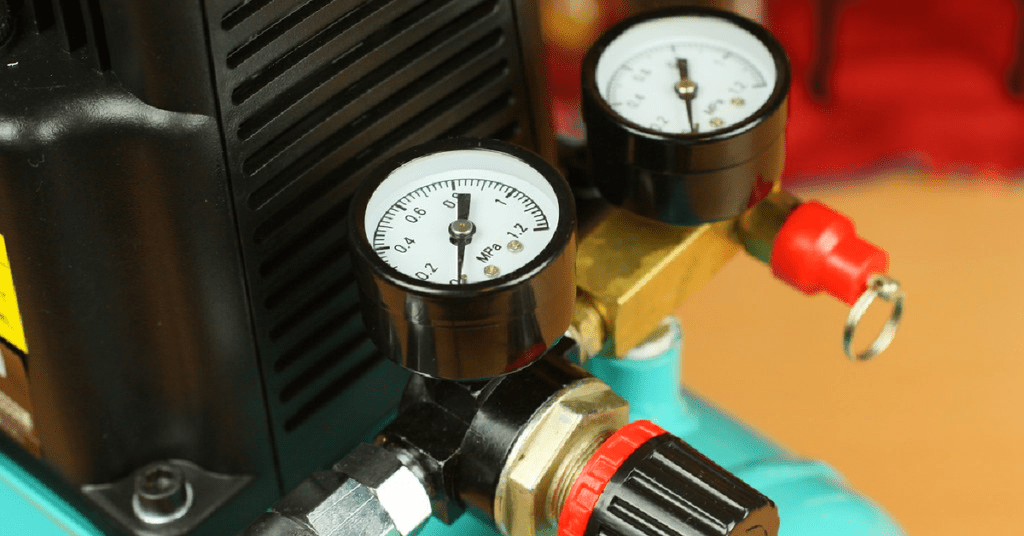
- Tank pressure gauge – This indicates the current air pressure inside the tank.
- Air inlet – This is where the air enters the compressor and it needs to be connected to a proper source of airflow.
- Power switch – Typically located on top of the compressor, this switch controls power to the unit.
Step 3: Planning Your Layout
Before you start connecting pipes and fittings, it’s important to plan out the layout of your air compressor. Consider factors such as distance from power sources, length of tubing needed, and any potential obstacles in the way. This will help you determine the best placement for your compressor and ensure that all components are easily accessible.
Step 4: Installing Fittings
- Cut pipes – Using a pipe cutter or hacksaw, cut the pipes to the desired length. Make sure to remove any burrs with a deburring tool.
- Apply thread sealant – Before installing fittings, apply thread sealant or pipe compound on the threads of each fitting for a secure and leak-free connection.
- Connect fittings – Begin connecting the fittings according to your planned layout. Make sure to use Teflon tape on all threaded connections for added security.
- Install pressure gauge – Screw the pressure gauge onto the tank’s pressure port. This will help you monitor and adjust the air pressure as needed.
- Install drain valve – Using a pipe wrench, install the drain valve at the bottom of the tank.
Step 5: Connecting Tubing
- Attach tubing – Using elbow and tee fittings, connect the air inlet to the outlet of the pressure switch.
- Run tubing to air tools – Use a connector fitting to run tubing from the compressor to your desired air tools.
- Secure connections – Make sure all connections are tight and secure using adjustable wrenches or pliers if needed.
Step 6: Testing Your Plumbing
Before turning on your air compressor, make sure to double-check all connections and fittings for any leaks. Once you are confident that everything is properly installed, turn on the power switch and test the compressor’s performance. Adjust the pressure levels as needed using the pressure gauge. If you notice any leaks or issues, turn off the compressor and check your connections again. With proper plumbing, your air compressor should be running smoothly and efficiently. If everything looks good, you’re all set to start using your newly plumbed air compressor!
Troubleshooting Common Plumbing Issues
Even with proper planning and installation, you may encounter some issues with your air compressor’s plumbing. Some common problems include leaks, pressure drops, and excess moisture in the tank. Here are a few troubleshooting tips to help you address these issues:
- Leaks – If you notice any leaks, check all connections and fittings for tightness. Apply Teflon tape or pipe compound as needed. If the issue persists, replace any damaged fittings or pipes.
- Pressure drops – This can be caused by a leak in the system or an undersized pipe. Check for leaks and make sure all components are properly sized according to your compressor’s needs.
- Moisture in tank – Excess moisture in the tank can lead to rust and damage over time. Make sure to regularly drain the tank using the drain valve and consider investing in a moisture trap for added protection.
Maintaining Your Air Compressor’s Plumbing
To ensure that your air compressor’s plumbing continues to function at its best, it’s important to regularly maintain it. Here are a few simple steps you can take to keep your system in top condition:
- Monitor for leaks – Regularly check all connections and fittings for any signs of leaks.
- Clean or replace filters – If your compressor has an air filter, make sure to clean or replace it as needed to prevent debris from entering the system.
- Drain tank regularly – As mentioned before, draining your tank regularly will prevent excess moisture from building up and causing damage.
- Check pressure levels – Keep an eye on the pressure gauge and adjust accordingly for optimal performance.
With these maintenance tips in mind, you’ll be able to enjoy a properly functioning air compressor for years to come. Happy plumbing! And always remember, safety should be your top priority while working with compressed air. Make sure to follow proper precautions and wear protective gear at all times.
FAQs for How to Plumb an Air Compressor Effectively
What size pipe should I use to plumb my air compressor?
The size of the pipe you should use depends on the size and power of your air compressor. Generally, a 1/2-inch pipe is sufficient for most home workshops, while larger commercial setups may require a 3/4-inch pipe.
Should I use copper or PVC pipe for my air compressor plumbing?
Copper is the preferred material for air compressor plumbing because it is more durable and can handle higher pressures than PVC. PVC is not recommended for air compressor plumbing as it can become brittle over time and may crack under high pressure.
Should I use Teflon tape on my air compressor fittings?
Yes, it is recommended to use Teflon tape on all threaded fittings to prevent air leaks. Apply the tape in a clockwise direction around the threads before screwing the fitting into place.
Should I install a moisture trap in my air compressor plumbing?
Yes, a moisture trap is essential to prevent water from accumulating in your air compressor tank and tools. Install the moisture trap as close to the compressor as possible and drain it regularly to prevent water buildup.
Can I use flexible hoses for my air compressor plumbing?
Flexible hoses can be used for short distances, but it is recommended to use rigid pipe for the majority of your air compressor plumbing. Flexible hoses can restrict airflow and may not be able to handle high pressure.
Conclusion
Plumbing an air compressor can be daunting, but with the right preparation, tools, and knowledge, you’ll be able to plumb your air compressor with confidence. Whether you’re a DIY hobbyist or a professional contractor, the importance of proper plumbing for an air compressor cannot be overstated. From understanding your needs and planning your layout through installation and testing, this guide will ensure that you successfully plumb an air compressor without any hiccups along the way.
Make sure to also take care of your plumbing system by regularly checking for leaks, maintaining an appropriate pressure level for your system, and replacing any worn-out parts as necessary.
