How to Use Caulk Without a Gun
Are you looking for a quick and easy way to caulk without having to invest in an expensive caulking gun? Caulking is an essential part of any DIY project as it helps seal cracks, and gaps protect from moisture infiltration and can even be used to deter pests. You may not realize that caulking doesn’t have to require the use of one of those big, fat guns today we’ll show you how to get the job done with just your hands!
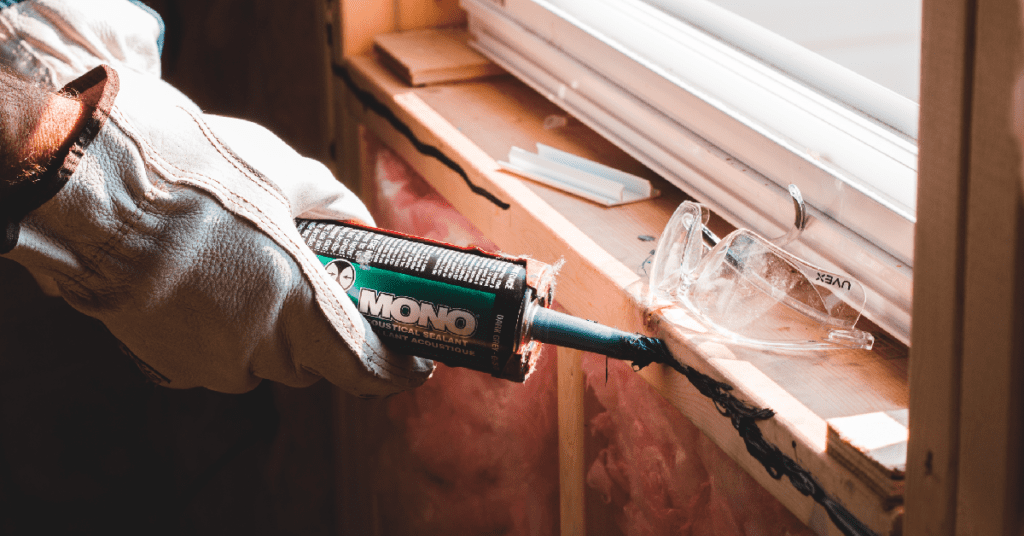
In this blog post, we will discuss different methods on how to use caulk without a gun. So grab some rubber gloves and join us as we explore all the ways caulking can make life easier for everyone – starting now.
Types of Caulk and Their Uses
Before we dive into the different methods of applying caulk without a gun, it’s essential to understand the types of caulk available in the market and their uses. There are various types of caulks designed for specific purposes, such as acrylic, silicone, latex, butyl rubber, and more. Each type has its unique properties that make them suitable for different applications.
- Acrylic caulk is a versatile and durable water-based sealant that excels in a wide range of interior and exterior projects. It is perfect for sealing gaps in trim and doors, as well as filling cracks and holes in walls and ceilings. With its exceptional adhesion properties, it provides a long-lasting and seamless finish that enhances energy efficiency by preventing air and moisture infiltration. Whether you’re a professional contractor or a passionate DIY enthusiast, acrylic caulk is the ultimate solution for all your sealing needs.
- Silicone caulk is the preferred choice for areas with high moisture levels, such as bathrooms, kitchens, and windows. Its remarkable water-resistance properties make it an ideal sealant for showers, sinks, and areas prone to frequent splashes. Moreover, the exceptional durability and flexibility of silicone caulk make it a superb option for outdoor applications, where it can withstand harsh weather conditions, including rain, snow, and UV exposure.
- Latex caulk a versatile sealing material, is an excellent choice for filling gaps and cracks around doors, windows, baseboards, and other non-porous surfaces. Its paintable nature adds to its appeal, making it a popular option for interior projects. With its ability to accommodate movement and provide a durable seal, latex caulk ensures long-lasting protection against air and moisture infiltration, while also enhancing the aesthetic appeal of your space.
Essential Tools and Materials
Now that we have a better understanding of the different types of caulk, let’s look at the essential tools and materials you’ll need to apply it without a gun. These include:
- Caulk – Choose the type of caulk that best suits your project needs.
- Rubber gloves – To protect your hands from getting sticky.
- Caulk finishing tool – This reusable tool helps you achieve a smooth, uniform seal and eliminates the need for finger smoothing.
- Utility knife or razor blade – To cut off the tip of the caulk tube.
- Painter’s tape – To create clean and straight lines while caulking around trim or edges.
- Damp cloth – For wiping away excess caulk and cleaning up any mess.
8 Easy Step-by-Step Guide to Using Caulk Without a Gun
Now that you have all the necessary tools and materials let’s dive into the step-by-step guide on how to use caulk without a gun.
Step 1: Prepare the surface
Before applying caulk, it is important to thoroughly clean the surfaces to be caulked. Remove any dirt, dust, or loose particles using a brush or vacuum cleaner. Additionally, ensure that the surfaces are completely dry to ensure proper adhesion of the caulk. If there is any old caulking residue, it is recommended to remove it using a caulk remover or a scraping tool. By taking these steps, you will create a clean and debris-free surface, providing the ideal conditions for a successful caulk application.
Step 2: Cut off the tip of the caulk tube
To prepare the caulk tube for application, take a utility knife or razor blade and carefully cut off the tip at a 45-degree angle. This angled cut will help control the flow and size of the caulk bead as you fill the gap. Remember, the size of the opening should correspond to the width of the gap you are filling to ensure proper coverage and adhesion.
Step 3: Put on rubber gloves
To protect your hands from getting sticky and ensure a clean application, it is important to put on a pair of rubber gloves before handling the caulk tube. By wearing gloves, you’ll have a better grip and avoid any mess or residue on your hands, making the caulking process more efficient and hassle-free.
Step 4: Apply caulk
To begin, take the caulk tube and gently squeeze it from the bottom. This will allow the caulk to flow smoothly as you run a bead of it along the gap or crack that needs to be filled. Take your time and apply just the right amount of pressure to ensure that the caulk is fully filled in, leaving no gaps or spaces behind. By paying attention to these details, you can achieve a professional-looking finish that will help seal and protect the area effectively.
Step 5: Smooth out with a caulking finishing tool
Take the caulking finishing tool and carefully glide it along the caulked surface, gently pressing down as you go. This will help to evenly distribute the caulk and create a smooth, seamless finish that adds a professional touch to your project. Ensure that you cover every inch of the caulked area, paying close attention to any corners or edges for a flawless result.
Step 6: Clean up any excess caulk
Take a clean, damp cloth and gently wipe away any excess caulk from the surface. Pay close attention to the edges and corners, ensuring a smooth and neat finish. This step is crucial to achieving a professional-looking result. By removing any remnants of caulk and tidying up the area, you’ll create a clean and polished appearance that enhances the overall aesthetic. So, don’t rush through this step and take your time to ensure a flawless finish.
Step 7: Remove painter’s tape (if using):
If you used painter’s tape to create straight lines, carefully peel it off in a slow and controlled manner before the caulk dries completely. This will help ensure clean and crisp edges, giving your project a professional finish. Take your time and be gentle to avoid any accidental smudging or damage to the freshly caulked surface.
Step 8: Allow it to dry
Depending on the type of caulk used, it is important to give it enough time to fully dry and cure. This will ensure a strong and long-lasting seal. The drying time can vary depending on factors such as humidity and temperature. As a general guideline, it is recommended to wait at least 24 hours before exposing the caulk to water or painting over it. Patience during this step will guarantee the best results and prevent any potential damage to the caulked area.
Cleaning up After Applying Caulk Without Gun
Cleaning up after applying caulk without a gun is a simple process. Just follow these easy steps:
- First, remove your rubber gloves and dispose of them properly.
- Wipe down any tools used with a damp cloth to remove any remaining caulk.
- If there are any leftover materials or residue, properly dispose of them according to local regulations.
- Clean any caulk from the surface using a damp cloth or a mild soap and water solution.
- After cleaning, let the area dry completely before using it again.
By following these cleaning steps, you’ll avoid any mess or damage to your tools and ensure a clean and tidy workspace. This will also help maintain the longevity of your caulking equipment for future use.
5 Tips and Tricks For Using Caulk Without a Gun
- When cutting the tip of the caulk tube, ensure that you cut it at a 45-degree angle for better control and application.
- Use painter’s tape to create clean lines while caulking around trim or edges.
- Practice on a small area before tackling larger projects to get a feel for the process and perfect your technique.
- If using silicone-based caulk, have a bowl of water handy to dip your fingers in and smooth out the caulk bead for an even finish.
- Remember to work slowly and carefully, taking breaks if needed, to ensure a clean and professional result.
By following these tips and tricks, you can make caulking without a gun a breeze and achieve professional-looking results every time.
Alternative Methods for Applying Caulk Without a Gun
If you don’t have access to a caulking gun, there are alternative methods for applying caulk. Some of these include:
- Use a putty knife or spatula to press the caulk into the gap.
- Place the caulk tube in a zip-top bag and cut off one corner to use as an improvised piping bag.
- Utilizing a syringe or oral medication dispenser to control the flow of caulk.
It’s important to note that these methods may require more time and precision, but with practice, they can be just as effective as using a caulking gun.
When to Hire a Professional
While applying caulk without a gun can be a simple and cost-effective solution for small projects, there are times when it’s best to hire a professional. Some situations where hiring a professional may be necessary include:
- Large-scale projects with multiple gaps and cracks that require precise application.
- Areas that are difficult to reach or require specific tools and equipment.
- When dealing with specialized or sensitive materials such as stone or natural wood.
Remember, it’s always better to hire a professional if you are unsure about the process or do not have the necessary experience for a successful outcome. This will ensure that the job is done correctly and efficiently, saving you time and potentially costly mistakes. Overall, caulking without a gun can be an effective method for sealing and protecting areas around your home. With the right tools, techniques, and patience, you can achieve professional-looking results without having to invest in a caulking gun. However, if the project is more extensive or complicated, it’s always best to seek professional help for a successful outcome.
FAQs for How to Use Caulk Without a Gun
Can I use caulk without a gun for outdoor projects?
Yes, but be sure to use a caulk that is specifically designed for outdoor use and can withstand exposure to the elements.
Can I use caulk without a gun for large projects?
Yes, but it may be more time-consuming and difficult to apply caulk without a gun for large projects. A caulk gun may be a more efficient option for larger projects.
Can I paint over caulk that has been applied without a gun?
Yes, most types of caulk can be painted over once they have dried. However, it is important to check the manufacturer’s instructions to make sure the caulk is paintable and to allow enough time for the caulk to dry completely before painting.
Can I touch caulk directly?
It is generally not recommended to touch caulk directly with your bare hands as it can be difficult to remove and may cause skin irritation. It is best to wear gloves when working with caulk to protect your skin. If you do accidentally get caulk on your skin, you can remove it with soap and water or a specialized caulk remover.
Conclusion
With the right tools and materials, proper technique and care, caulking without a gun can be an easy and effective way to keep your home in top condition. But no matter what method you choose, remember that the most important step is to take your time. Properly applied caulk can make all the difference in ensuring a water-tight seal and a job well done. If you find you need help or still have questions, never hesitate to hire a professional for help with caulking projects. Now that you know everything there is about using caulk without a gun, it’s time for you to get out there and protect those windows and walls!
