

How to Remove Moisture from Air Compressor
Having an air compressor in your garage or workshop might make some of your everyday jobs much easier, but dealing with moisture from the air can quickly become a nuisance. Moisture build-up inside an air compressor not only affects performance but also increases wear and tear on the machine, leading to costly repairs down the line. Fortunately, understanding how to remove moisture from an air compressor is relatively straightforward and can help you save time and money in the long run. In this blog post, we’ll explore how to remove moisture from air compressor and some tips for preventing and managing excess moisture in your air compressors so that they stay running like new.
Identify the source of moisture in your air compressor
The first step in removing moisture from your air compressor is to determine where it’s coming from. There are three main sources of moisture in an air compressor: ambient air, compressed air, and the compressor itself.
- Ambient air: Moisture from humid or wet environments can easily enter the intake valve of your air compressor and cause condensation inside the tank.
- Compressed air: When air gets compressed, its temperature rises, causing water vapor to condense and collect inside the tank.
- The compressor itself: As the compressor runs, it produces heat that can cause moisture inside the tank to evaporate and mix with compressed air.
Identifying the source of moisture will help you determine which prevention method is most suitable for your specific situation.
Signs of Moisture in an Air Compressor
Before learning how to remove moisture from an air compressor, it’s essential to recognize the signs of excess moisture in your machine. Here are a few tell-tale indicators that your air compressor may have too much moisture:
- Water dripping from the tank: This is one of the most obvious signs that there’s excess moisture inside your air compressor.
- Rust or corrosion on internal parts: If you notice any rust or corrosion on the metal components of your air compressor, it’s a sure sign that there’s too much moisture present.
- Water in the compressed air line: When using your air compressor, you may notice water droplets coming out along with the air. This is a clear indication of excess moisture.
If you experience any of these signs, it’s essential to take action promptly to prevent further damage to your air compressor.
Tools and Materials for Removing Moisture from an Air Compressor
Before we dive into the methods of removing moisture from an air compressor, let’s first take a look at some essential tools and materials you’ll need:
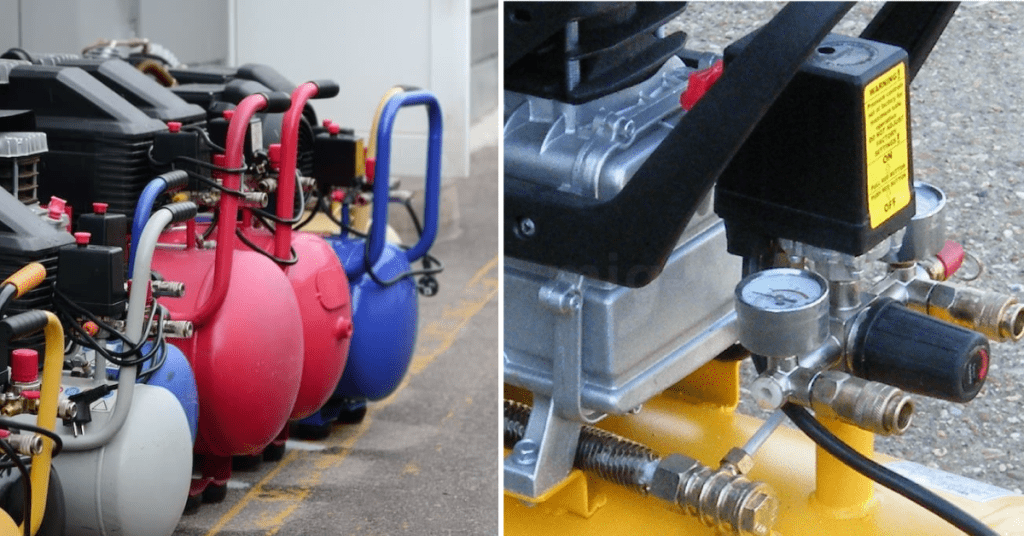
- Drain valve: This is a small valve located at the bottom of your air compressor tank. It allows you to drain out any water collected inside.
- Air dryer: An air dryer helps remove excess moisture from compressed air before it enters your air tools or equipment.
- Water separator: Similar to an air dryer, a water separator removes moisture from compressed air by separating it through centrifugal force.
- Moisture trap/filter: These devices are designed to catch and remove any moisture present in the air before it reaches your air tools.
Safety Precautions
Before attempting to remove moisture from your air compressor, ensure that you follow these basic safety precautions:
- Disconnect the power: Before working on your air compressor, make sure it’s unplugged or disconnected from any power source.
- Wear protective gear: When dealing with compressed air and potential rust or corrosion, wear safety glasses, gloves, and a mask to protect yourself.
- Allow the compressor to cool down: If your air compressor has been running, make sure to let it cool down before attempting any maintenance.
4 Easy Methods for Removing Moisture from an Air Compressor
Method 1: Using an Air Compressor Filter/Moisture Trap
An air compressor filter, also known as a moisture trap, is an easy and effective way to remove excess moisture from your air compressor. These devices come in various sizes and can be attached directly to your air compressor’s outlet or at the point of use for individual tools. Make sure to regularly clean and replace the filter to maintain its effectiveness.
Method 2: Using an Air Dryer
An air dryer is another popular method for removing moisture from compressed air. These devices use a desiccant material, such as silica gel or activated alumina, to absorb and trap water vapor before it reaches your tools. Air dryers are available in different types, including refrigerated dryers, deliquescent dryers, and membrane dryers.
Method 3: Using a Water Separator
Similar to an air dryer, a water separator uses centrifugal force to remove moisture from compressed air. The device separates the water droplets from the compressed air and collects them in a separate chamber for draining. Water separators are commonly used in conjunction with other moisture removal methods for optimal results.
Method 4: Draining the Tank Manually
One of the simplest ways to remove moisture from an air compressor is by manually draining the tank. This method involves using the drain valve located at the bottom of your air compressor’s tank to release any water collected inside. Make sure to do this regularly, especially if you use your air compressor frequently in a humid environment.
Step-by-Step Instructions for Each Method
Method 1: Using an Air Compressor Filter/Moisture Trap
Step 1: Identify the air compressor filter/moisture trap attachment point on your machine.
Step 2: Remove any dust or debris that may have accumulated around the attachment point and clean it thoroughly.
Step 3: Attach the filter/moisture trap to the attachment point, making sure it is securely in place.
Step 4: If your air compressor has an oil lubrication system, make sure to drain and replace the oil regularly to prevent excess moisture buildup.
Step 5: Clean or replace the filter/moisture trap as needed, following the manufacturer’s instructions.
Method 2: Using an Air Dryer
Step 1: Determine the type of air dryer suitable for your air compressor and purchase one if necessary.
Step 2: Install the air dryer according to the manufacturer’s instructions, making sure it is securely attached to your air compressor.
Step 3: Regularly check and replace the desiccant material in your air dryer as needed.
Method 3: Using a Water Separator
Step 1: Purchase a water separator suitable for your air compressor.
Step 2: Install the water separator according to the manufacturer’s instructions, making sure it is securely attached to your air compressor.
Step 3: Regularly drain the collected water from the separator as needed.
Method 4: Draining the Tank Manually
Step 1: Locate the drain valve at the bottom of your air compressor tank.
Step 2: Place a container or hose under the valve to catch the water.
Step 3: Slowly open the valve and allow all the water to drain out completely.
Step 4: Close the valve securely when finished.
Regular Maintenance and Prevention Tips
- Regularly check and replace any filters or desiccant material to maintain the effectiveness of your moisture removal methods.
- Make sure to drain your air compressor regularly, especially if used in a humid environment.
- Keep your air compressor in a well-ventilated area to prevent excess moisture buildup.
- Consider investing in an air dryer or water separator for optimal results.
Troubleshooting Moisture Issues
If you’re still experiencing moisture-related problems with your air compressor, here are a few troubleshooting tips:
- Check for any leaks in your air compressor system.
- Make sure all attachments and connections are secure.
- Consider using multiple moisture removal methods for better results.
FAQs on Removing Moisture From an Air Compressor
How often should I drain my air compressor?
It’s recommended to drain your air compressor after each use, especially in humid environments. If used less frequently, make sure to drain it at least once a week.
Can I use multiple moisture removal methods at the same time?
Yes, using multiple methods such as an air dryer and water separator can provide better results.
How do I know if my air compressor has excess moisture?
Signs of excess moisture in your air compressor include rust or corrosion on the tank, water coming out of the air hose, and decreased performance.
Conclusion
In conclusion, moisture in an air compressor is a serious issue that needs to be addressed promptly. As we’ve seen, failing to identify and remove the source of moisture can lead to serious damage, not only to your air compressor and its components but also to your output and the machines you’re powering. A little maintenance at regular intervals goes a long way toward avoiding future problems.
Make sure you familiarize yourself with the signs of moisture in an air compressor, always use safety precautions when working around moving parts, and if needed, make sure to follow one of our methods for efficiently removing it. We hope this post has given you the insight and knowledge you need to diagnose and solve this issue. Now that you know how to identify moisture in an air compressor, be proactive about protecting your equipment and keeping things running smooth


