

How to Remove Mold From Silicone Caulk
Have you ever been in the middle of remodeling your bathroom and found yourself having to deal with moldy or mildew-covered silicone caulk? Not only is it unappealing, but a buildup of mold can also put your family’s health at risk. Don’t worry! In this blog post, we’ll walk you through a few simple steps that will help you get rid of unwanted mold from your silicone caulk quickly and efficiently.
While cleaning silicone caulk may seem challenging for those without professional training, don’t dismiss it just yet. This guide offers clear and user-friendly instructions to make the task more approachable. Here’s how to remove mold from silicone caulk and keep your home clean and healthy.
Exploring the Reasons Behind Mold Growth on Silicone Caulk
Before we dive into the cleaning process, it’s essential to understand why mold grows on silicone caulk in the first place. Silicone caulk is commonly used in bathroom and kitchen areas because of its waterproof and mold-resistant properties. However, over time, moisture can seep through cracks or gaps in the caulk, leading to mold growth. This is especially common in bathrooms, where there is a high level of humidity and water exposure. Poor ventilation and lack of natural light can also contribute to mold growth on silicone caulk.
Tools and Materials Needed
To effectively remove mold from silicone caulk, you’ll need the following tools and materials:
- Rubber gloves
- Safety glasses
- Scrub brush or toothbrush
- Baking soda
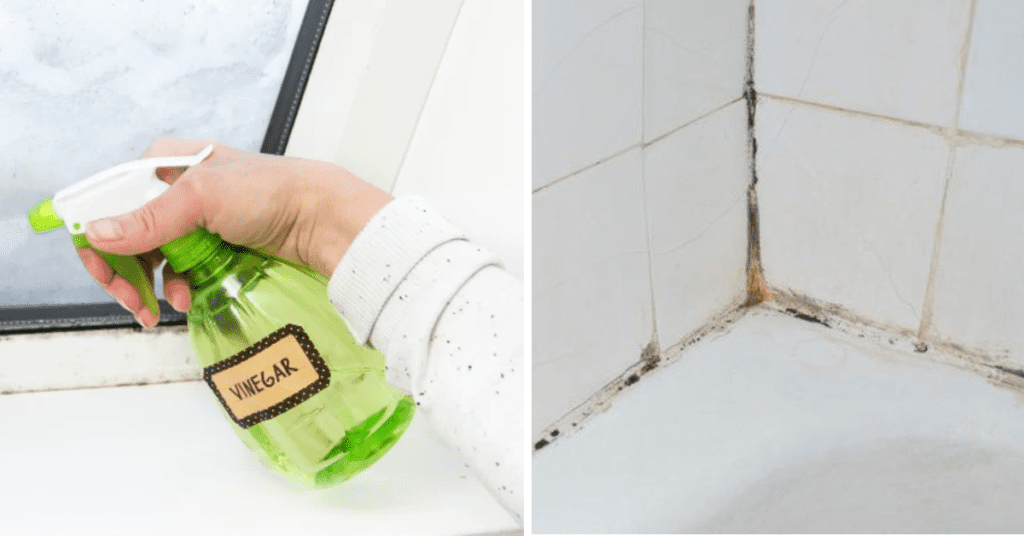
- White vinegar
- Bleach or hydrogen peroxide (optional)
- Plastic wrap (optional)
Safety Precautions
Before you start cleaning, it is crucial to take the necessary safety precautions to ensure your well-being. Begin by protecting your skin and eyes by wearing durable rubber gloves and safety glasses throughout the entire cleaning process. These simple yet vital measures will shield you from any potential harm.
Remember, if you are using bleach or hydrogen peroxide, it is highly recommended to work in a well-ventilated area. Adequate ventilation will help minimize any potential fumes or odors, ensuring a safer environment for you while you clean.
By following these additional safety measures, you can confidently tackle your cleaning tasks with peace of mind, knowing that you are taking the necessary steps to protect yourself. Stay safe and enjoy a clean and healthy space!
6 Easy Steps for Removing Mold from Silicone Caulk
Step 1: Preparing the Area
The first step in preparing the area is to carefully remove any items that may obstruct your work, such as toiletries or bath mats, from the affected area. By doing so, you create a spacious environment that allows for easier maneuverability and reduces the risk of accidental bleach spills on your personal belongings. Additionally, it is advisable to take an extra precautionary measure by covering nearby surfaces with plastic wrap or old towels. This simple act serves to safeguard these surfaces from any potential contact with the cleaning solution, ensuring their protection throughout the cleaning process.
Step 2: Mixing Your Cleaning Solution
In a small bowl or container, carefully combine equal parts of baking soda and white vinegar to create a thick and smooth paste. If you want to enhance its cleaning power, you can consider adding a few drops of bleach or hydrogen peroxide, although this step is entirely optional. The fascinating chemical reaction that occurs when baking soda and vinegar are mixed produces a powerful and effective cleaning agent that is known to effectively eliminate mold, leaving your surfaces fresh and sanitized.
Step 2: Creating a Homemade Cleaning Solution
If you prefer to use natural cleaning solutions, you can create a homemade cleaner by mixing equal parts of water and white vinegar. This simple yet effective solution not only helps remove mold from silicone caulk but also leaves behind a fresh and clean scent that is gentle on the environment. For a stronger cleaning option, you can mix hydrogen peroxide and water in a 1:2 ratio. This powerful solution tackles tough mold stains and ensures a thorough cleaning experience. With these natural cleaning alternatives, you can maintain a pristine and healthy living space while minimizing your impact on the planet.
Step 3: Applying the Cleaning Solution
Using a scrub brush or toothbrush, carefully apply the cleaning solution to the moldy silicone caulk, ensuring to cover all visible areas of mold. Allow the solution to sit for 10-15 minutes, allowing the powerful combination of vinegar and baking soda to effectively loosen the mold. This process will facilitate the subsequent removal of the mold, making the task considerably easier and more efficient.
Step 4: Scrubbing and Brushing the Mold
After the solution has had time to sit, use the scrub brush or toothbrush to scrub away the mold. The combination of vinegar and baking soda will help in breaking down and lifting the mold from the surface. Continue scrubbing until all visible traces of mold are gone. For tough stains, you can also use a commercial mold and mildew cleaner.
Step 5: Rinsing and Drying the Area
Once all the mold has been removed, rinse the area thoroughly with water and dry it with a clean cloth. Make sure to remove any residue from the cleaning solution, as it can be slippery when wet. For extra protection against mold, you can also apply a silicone caulk sealant to the area.
Step 6: Preventive Measures
To prevent future mold growth, it’s essential to address the root cause. Check for any leaks or cracks in the caulk and repair them immediately. It’s also helpful to keep your bathroom well-ventilated by using a fan or opening windows when possible. Regularly cleaning and drying the area after use will also help prevent mold growth. Additionally, you can consider using a mold-resistant caulk in the future.
Using Commercial Mold Removers
If the above methods don’t work, you can also opt for commercial mold and mildew removers. These products are specifically designed to remove mold and prevent its regrowth. However, make sure to follow the instructions carefully and use proper ventilation when using these products. Additionally, always wear protective gear and avoid mixing different cleaning chemicals.
Natural Remedies for Mold Removal
If you prefer to use natural remedies, there are a few alternatives to consider. Some options include using tea tree oil, grapefruit seed extract, or hydrogen peroxide as a mold-fighting agent. These natural solutions can be mixed with water and applied in the same manner as the homemade cleaning solution. However, it’s essential to note that these remedies may not be as effective as commercial cleaners and may take longer to see results.
Tips for Maintaining Mold-Free Silicone Caulk
To keep your silicone caulk mold-free, here are some simple tips to follow:
- Regularly clean and dry the caulk after use.
- Keep the area well-ventilated and reduce humidity levels.
- Fix any leaks or cracks in the caulk immediately.
- Use a caulk sealant for added protection.
- Consider using mold-resistant silicone caulk in the future.
FAQs on Removing Mold From Silicone Caulk
Can I use bleach to remove mold from silicone caulk?
Yes, you can use a mixture of bleach and water or hydrogen peroxide to effectively remove mold from silicone caulk.
How often should I check my silicone caulk for mold growth?
It is recommended to regularly check your silicone caulk for any signs of mold growth at least once a month.
Is it safe to mix different cleaning chemicals when removing mold?
No, it is not safe to mix different cleaning chemicals as it can produce harmful fumes. Stick to one type of cleaner or use natural remedies instead.
Will using natural remedies take longer to remove mold?
Yes, natural remedies may take longer to show results compared to commercial cleaners. However, they are a safer and more environmentally friendly option.
Can I prevent future mold growth by using mold-resistant caulk?
Using mold-resistant caulk can help prevent future mold growth, but it’s also essential to address the root cause, such as leaks or excess moisture in the area. Overall, regularly cleaning and maintaining your silicone caulk is key to preventing mold growth.
Conclusion
To properly remove mold from silicone caulk, you must have the proper tools and materials, as well as take the necessary safety precautions. It is important to start by completely removing the silicone caulk and cleaning the surface more thoroughly using commercial mold removers or natural remedies such as bleach and vinegar. The most important step in the process is to create a dry environment as this will greatly reduce the chances of mold returning in the future.
Taking these steps and creating a mold-free environment will ensure your silicone caulk remains free of mold for years to come. Now that you’re aware of the appropriate tools, materials, safety precautions, and steps for removal, why not take action by starting on your project today? With patience and careful measures taken, you can fight off any visible signs of mold growth henceforth!


