

How to Remove Caulk from Windows
Are you tired of the old, unsightly caulk around your windows that detracts from the overall look of your home? Maybe it’s cracked and peeling away or simply outdated. The good news is that removing the old caulk doesn’t have to be complicated!
If you’re trying to get rid of old caulk around your windows, there are a few different methods you can try. In this blog post, we’ll show you how to remove caulk from windows using a few different tools and techniques.
Reasons for Removing Caulk from Windows
There are a variety of reasons why you may want to remove caulk from your windows. Some common reasons include:
- Damaged or Peeling Caulk: Over time, the caulk can lose its adhesion and start to crack, peel, or even shrink away from the surface it was applied. This not only looks unsightly but can also leave gaps where water and air can seep in.
- Outdated Caulk: If your home has old caulk that is discolored, yellowing, or just plain unsightly, removing it can improve the overall appearance of your windows.
- Re-Caulking for Better Insulation: If you are looking to improve the energy efficiency of your home, removing old caulk and replacing it with new, high-quality caulk can help prevent drafts and reduce your heating and cooling costs.
- Preparing for Painting or Renovation: If you are planning to paint or remodel your windows, removing old caulk is an essential step in ensuring a smooth and professional-looking finish.
Tools and Materials Needed
Before you begin removing caulk, make sure you have the right tools and materials on hand. Here’s what you’ll need:
- Caulk Remover: A specialized caulk remover solution or gel can help loosen the old caulk and make it easier to remove.
- Putty Knife or Razor Blade Scraper: These tools are essential for scraping away the old caulk from your windows.
- Gloves: To protect your hands from any chemicals that may be in the caulk remover or sharp edges of the scraper, wearing gloves is recommended.
- Safety Glasses: If you are using a razor blade scraper, it’s important to wear safety glasses to protect your eyes from any potential flying debris.
- Sponge or Cloth: A sponge or cloth will come in handy for cleaning the surface once the caulk has been removed.
- Mineral Spirits (Optional): If you are having difficulty removing any leftover residue from the old caulk, mineral spirits can help dissolve it.
Safety Precautions
Before you begin removing caulk from your windows, it’s important to take some safety precautions. These include:
- Ventilation: Make sure the room is well-ventilated by opening windows or using fans to circulate fresh air.
- Protective Gear: As mentioned earlier, wearing gloves and safety glasses can help protect your hands and eyes while working with caulk remover and scraping tools.
- Read Labels: Always read the labels on any caulk remover or mineral spirits you are using to ensure proper usage and safety precautions.
4 Easy Steps for Removing Caulk from Windows
Step 1: Softening the Caulk
To begin the process of caulk removal, it is important to soften the caulk first. By doing so, you can ensure an easier and more efficient removal while minimizing the risk of damage to your windows. One effective method is to apply a specialized caulk remover solution or gel, following the instructions provided by the manufacturer. Depending on the product you choose, it may be necessary to allow a specific amount of time for the caulk to soften before proceeding to the next step. This crucial step sets the foundation for a successful caulk removal process, ensuring that you achieve optimal results.
Step 2: Cutting and Scoring the Caulk
To begin removing the caulk, you can use a putty knife or a razor blade scraper. Take your time and be cautious as you carefully cut and score the softened caulk along the edges of your window. This process will effectively loosen the caulk, making it even easier to remove afterward. By paying attention to these details, you’ll ensure a smoother caulk removal process.
Step 3: Using a Caulk Removal Tool
When faced with the task of removing a large area of caulk, consider using a specialized caulk removal tool. These handy tools are specifically designed to make the process easier and more efficient. By utilizing a caulk removal tool, you can save valuable time and effort. These tools are expertly crafted to ensure that the old caulk is scraped away without causing any damage to the underlying surface. With their precision and effectiveness, caulk removal tools are an indispensable asset for any caulk removal project. So, next time you find yourself tackling a caulk removal job, remember to reach for a reliable caulk removal tool to simplify the task and achieve professional results.
Step 4: Removing Residual Caulk
Once you have successfully removed the majority of the caulk, it’s important to thoroughly clean the surface to eliminate any lingering residue. Take a sponge or cloth and gently wipe the area to ensure a smooth and clean finish.
If you encounter any stubborn bits of caulk that refuse to budge, you can try using mineral spirits as a powerful solution to dissolve them. It’s important to exercise caution and carefully follow the instructions provided by the manufacturer when using mineral spirits. By doing so, you can effectively tackle any remaining caulk and achieve a pristine result.
Cleaning and Preparing the Surface
Before applying new caulk, it is important to properly clean and prepare the surface. Remove dirt and debris with warm soapy water and ensure it is completely dry. Consider using a primer for better adhesion, especially on porous or uneven surfaces. Following these steps will help ensure a successful and durable caulk application.
Reapplying Caulk to Windows (Optional)
If you have removed caulk for reapplying, follow these steps to ensure a professional-looking finish:
- Choose the Right Caulk: There are different types of caulks available on the market, such as silicone or acrylic latex. Choose the appropriate type based on your needs and preferences.
- Cut the Nozzle at an Angle: When cutting the nozzle of your caulk tube, make sure to cut it at a 45-degree angle for better application control.
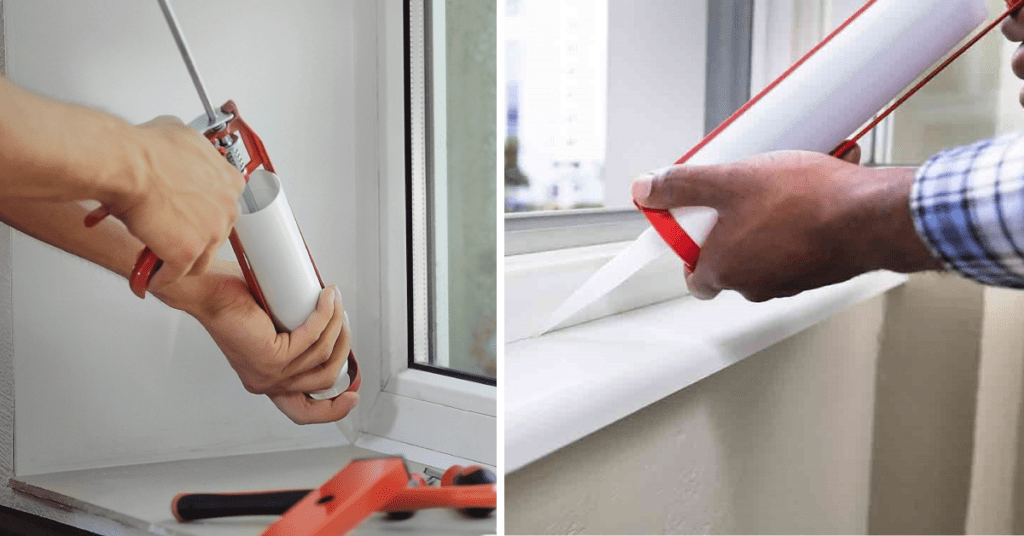
- Start with a Small Bead: Begin applying the caulk in small sections, using steady pressure on the trigger. This will help prevent any excess from oozing out.
- Smooth out the Caulk: Use a wet finger or caulk smoothing tool to smooth out the caulk in a continuous motion. This will give your windows a neat and professional look.
- Remove Excess with a Damp Cloth: After smoothing, use a damp cloth to remove any excess caulk from the surface and surrounding areas.
Common Mistakes to Avoid
While removing and reapplying caulk may seem like a simple task, there are some common mistakes to avoid for optimal results:
- Not Softening the Caulk Enough: Not allowing enough time for the caulk remover to soften the old caulk can make it difficult to remove and may result in damage.
- Using Too Much Force: Using excessive force when scraping or cutting the caulk can cause damage to your windows.
- Not Cleaning the Surface Properly: Skipping the cleaning and preparation step can result in poor adhesion and ultimately, a failed caulk application.
- Applying Too Much Caulk: Applying too much caulk at once can lead to messy results and uneven coverage. It’s always better to start with a small bead and add more as needed.
By following these steps and avoiding common mistakes, you can successfully remove and reapply caulk to your windows with professional results.
4 Alternative Methods for Caulk Removal
Method 1: Using Heat Gun
For thicker and more stubborn caulk, using a heat gun can be an effective alternative method for removal. Simply apply heat to the caulk with the gun and carefully scrape it off once it softens.
Method 2: Using Steam
Similar to using a heat gun, steaming the caulk can also help soften and loosen it for easier removal. This method is especially useful for removing caulk from delicate surfaces.
Method 3: Using a Rotary Tool
If you have a rotary tool at hand, you can use it with a specialized caulk removal attachment to effectively cut through and remove old caulk. This method may be more time-consuming but can be highly effective for tough jobs.
Method 4: Using a Solvent
In cases where the caulk cannot be removed with traditional methods, using a solvent such as acetone or denatured alcohol can help dissolve and remove the caulk. Be sure to read and follow the instructions carefully when using solvents.
FAQs on Removing Caulk from Windows
How long does caulk take to dry?
The drying time for caulk varies depending on the type of caulk and environmental conditions. Generally, it can take anywhere from 24 hours to a few days to completely dry.
Can new caulk be applied over old caulk?
Yes, new caulk can be applied over old caulk as long as the old caulk is clean and in good condition. However, it’s important to avoid layering too many layers of caulk, as this can lead to an unstable and ineffective seal.
Can I paint over new caulk?
Yes, once the new caulk has completely dried, you can paint over it. It’s recommended to use a caulk specifically designed for painting over, such as paintable acrylic latex caulk.
How often should caulk be replaced?
Caulk should be replaced when it starts to show signs of wear and tear, such as cracking or pulling away from the surface. It’s also important to regularly check and replace any damaged or deteriorating caulk to maintain the integrity of your windows.
Conclusion
Removing caulk from windows may seem like a daunting task at first, but it doesn’t have to be complicated. By following the safety precautions and using the correct tools and materials, you can easily remove the caulk and clean and prepare the surface for reapplication if that’s your goal. Avoid common mistakes such as not following manufacturer instructions or not using proper ventilation to reduce fumes. Alternatively, you could use alternative methods like steamers and heat guns to make the job easier.
Whatever method you choose, do keep in mind that it will take practice and patience to achieve the desired result – just don’t give up! As one of the most important sealing agents for your home’s windows, it is essential to maintain their integrity through regular inspections as well as timely caulking repairs, this will help ensure your family’s safety and comfort for many years to come.


