

How to Remove Spray Foam
Removing spray foam can be quite a challenging task that demands patience and the right tools. Whether you’re using it to fill gaps in your home’s insulation or applying it as an adhesive for wall decor, this tricky substance can be a real headache to clean up. But fret not! With valuable insights from seasoned professionals, you’ll soon master the art of removing spray foam like a pro.
We’ve crafted a comprehensive guide covering everything you need to know about swiftly and effortlessly removing unwanted spray foam. In this comprehensive article, we’ll walk you through how to remove spray foam from various surfaces including skin, clothing, and different materials. So get ready for some expert advice as we delve into the best strategies for confidently tackling this messy undertaking!
Tools and Materials Needed for Removing Spray Foam
Before we dive into the step-by-step removal process, it’s essential to have the right tools and materials on hand. These include:
- Plastic or metal scraper: This will help you gently scrape away any excess foam without damaging the surface.
- Solvent for removing polyurethane spray foam: The most effective solvents are typically acetone, mineral spirits, or isopropyl alcohol.
- Protective gear: Make sure you have a pair of gloves, safety glasses, and a mask to protect yourself from any potential harm.
- Soap and warm water: This will come in handy for removing any foam residue on your skin or fabric.
- Old cloth or rag: You can use this to apply the solvent or clean up any spills.
- Sandpaper: In case you need to remove hardened foam from a surface, sandpaper can be useful.
- Paper towels or cotton swabs: These will help you clean up small areas with precision.
Safety Precautions for Removing Spray Foam
While removing spray foam, it’s crucial to take the necessary safety precautions. This will help you avoid any potential accidents or harm caused by mishandling the foam or solvents.
- Wear protective gear: As mentioned earlier, make sure you have gloves, safety glasses, and a mask on while working with spray foam and solvents.
- Work in a well-ventilated area: Solvents can emit strong fumes that may be harmful if inhaled. Make sure you’re working in a well-ventilated space to avoid any health risks.
- Keep the area clean and organized: It’s essential to have a tidy workspace, so you don’t accidentally spill solvents or trip over tools while removing spray foam.
- Avoid skin contact with solvents: Some solvents can cause irritation or burns if they come in contact with your skin. In case of accidental contact, rinse the affected area thoroughly with soap and warm water.
- Dispose of materials properly: Make sure to follow local guidelines for disposing of any leftover foam, solvent, or used materials. Do not pour solvents down the drain as they can be harmful to the environment.
Types of Spray Foam and Removal Methods
Before we get into the removal process, it’s crucial to understand the different types of spray foam and their characteristics. This will help you determine the most effective method for removing each type.
Freshly Applied Foam Removal
Freshly applied spray foam is much easier to remove compared to hardened foam. If you notice any unwanted foam immediately after application, you can use a solvent-soaked cloth or scraper to gently wipe it away from the surface. This method is ideal for removing foam from skin, clothing, and other fabrics. Make sure to act quickly before the foam dries and hardens.
Hardened Foam Removal
Removing hardened spray foam can be a bit more challenging, but not impossible. If the foam has cured completely, you’ll need to use a scraper or sandpaper to carefully remove it without damaging the surface. Depending on the type of foam, you may need to use a specific solvent or consult a professional for assistance.
5 Easy Step-by-Step Removal Process for Various Surfaces
Now that you have a good understanding of the tools, materials, and safety precautions, let’s dive into the step-by-step removal process for different surfaces.
Step 1: Assessing the Foam
Before you begin removal, it’s essential to assess the foam and its properties. This will help determine the best method for removing it without causing any damage.
- If the foam is still wet or soft, you can use a solvent-soaked cloth to wipe it away gently.
- For hardened foam, use a scraper or sandpaper to remove it carefully from the surface.
- In case of foam residue, use a solvent-soaked cloth or cotton swab to clean it up.
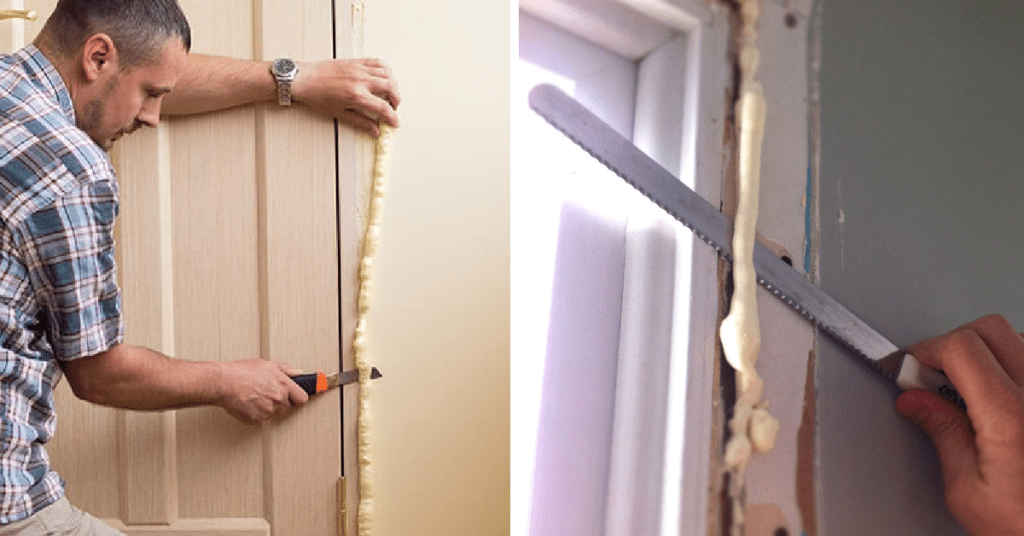
Step 2: Trimming Excess Foam
If the foam has expanded beyond the intended area, you can use a plastic or metal scraper to carefully trim off any excess. Make sure not to press too hard as it may spread the foam further. You can also use a knife or scissors for more precise trimming.
Step 3: Applying Solvent (if applicable)
If the foam has cured, you’ll need to soften it before removing it. You can do this by applying a solvent-soaked cloth or cotton swab to the affected area for a few minutes. Once the foam has softened, use a scraper or sandpaper to remove it carefully. If you’re unsure which solvent to use, refer to the instructions on the foam can or seek professional advice.
Step 4: Scraping and Peeling
After applying the solvent, start scraping or peeling the foam off the surface using a plastic or metal scraper. Be careful not to damage the underlying material. You may need to use multiple scrapers or switch to sandpaper for hard-to-reach areas.
Step 5: Sanding the Surface (if applicable)
In case the foam has hardened and cannot be removed with a scraper, you can use sandpaper to sand down the surface gently. This will help remove any remaining foam residue without causing damage. Make sure to wear protective gear and work in a well-ventilated area while sanding.
Cleaning and Finalizing after Removal
Once you’ve successfully removed the spray foam, it’s essential to clean up the workspace and dispose of any leftover materials properly. Here are a few steps you can follow:
- Use paper towels or cotton swabs to clean up any remaining residue or spills.
- Rinse the surface with warm water and soap to remove any solvent or foam remnants.
- Dispose of used materials and solvents according to local guidelines.
- Let the area dry completely before using it again.
Remember, removing spray foam can be a messy and time-consuming process. It’s always best to take your time and work carefully to avoid any damage or accidents. If you’re unsure about the removal process, it’s best to seek professional help to ensure proper and safe removal.
Dealing with Tough or Hardened Foam
Some spray foams may be more difficult to remove, especially if they have cured for an extended period. In these cases, it’s best to consult a professional or consider using specialized foam removers. There are various foam removal products available in the market that can help soften and dissolve hardened foam, making it easier to remove.
Tips and Tricks for Easier Removal
Here are a few additional tips and tricks that can make the spray foam removal process more manageable:
- Use a heat gun or hairdryer to soften hardened foam before scraping it off.
- If using sandpaper, start with a higher grit (around 80) and gradually decrease to avoid damaging the surface.
- For skin contact, use mineral oil or petroleum jelly to help remove the foam.
- Wear gloves and protective eyewear while removing spray foam to avoid skin and eye irritation.
FAQ for Spray Foam Removal
Is it safe to remove spray foam yourself?
It’s generally safe to remove small amounts of spray foam yourself, following proper safety precautions and using the right tools and materials. However, for larger or tougher jobs, it’s best to seek professional help.
Can I reuse leftover spray foam?
No, once opened, spray foam will continue to expand and cure, making it unusable. It’s best to dispose of any leftover foam properly.
How can I prevent spray foam from sticking to unwanted surfaces?
Before applying spray foam, cover or mask off any surfaces that you don’t want the foam to stick to, such as windows, doors, and floors. You can also use tape or plastic sheeting for added protection.
Is there a way to prevent spray foam from hardening in the nozzle?
After using the foam, use a can of gun cleaner or mineral spirits to clean out any remaining foam from the nozzle and straw. This will help keep them clear for future use.
Can I remove cured spray foam from clothing?
Yes, you can use solvents like acetone or mineral spirits to help remove cured spray foam from clothing. However, it may be challenging to remove completely, so it’s best to wear old or protective clothing while working with spray foam.
Conclusion
Removing spray foam may seem daunting, but following proper safety precautions and using the right tools and materials, can be a manageable task. Remember to assess the foam, trim excess, soften if needed, scrape or peel carefully, and clean up properly after removal. If you encounter any challenges or have concerns, don’t hesitate to seek professional assistance. With these easy step-by-step instructions and additional tips, you can safely remove spray foam and restore your surfaces. So next time, don’t let a little spill of foam cause any inconvenience and follow these steps to easily remove it. Happy home repairing!


