How to Replace the Drain Valve on Air Compressor
Your air compressor is a silent workhorse in your DIY arsenal, ready to power your pneumatic tools and easily inflate your tires. Yet, even the most reliable compressor needs proper maintenance to ensure it runs smoothly, which many overlook until their tools start sputtering or the tank no longer charges as quickly.
Among the vital elements of air compressor maintenance is the drain valve. A tiny component often underestimated in its critical role, the drain valve helps keep your tank free from moisture and contaminants that can cause damage and corrosion. If your compressor has started to show signs of wear – perhaps it leaks air or is slow to drain – it might be time to replace the drain valve.

This in-depth guide is aimed at arming DIY enthusiasts, home mechanics, and tool users with the knowledge to replace the drain valve on an air compressor. We will walk through every step, ensuring that you complete the replacement correctly and understand the principles and safety measures you should take along the way. Ready to keep your air flowing and your tools at peak performance? Let’s begin.
Understanding the Importance of Drain Valve Maintenance
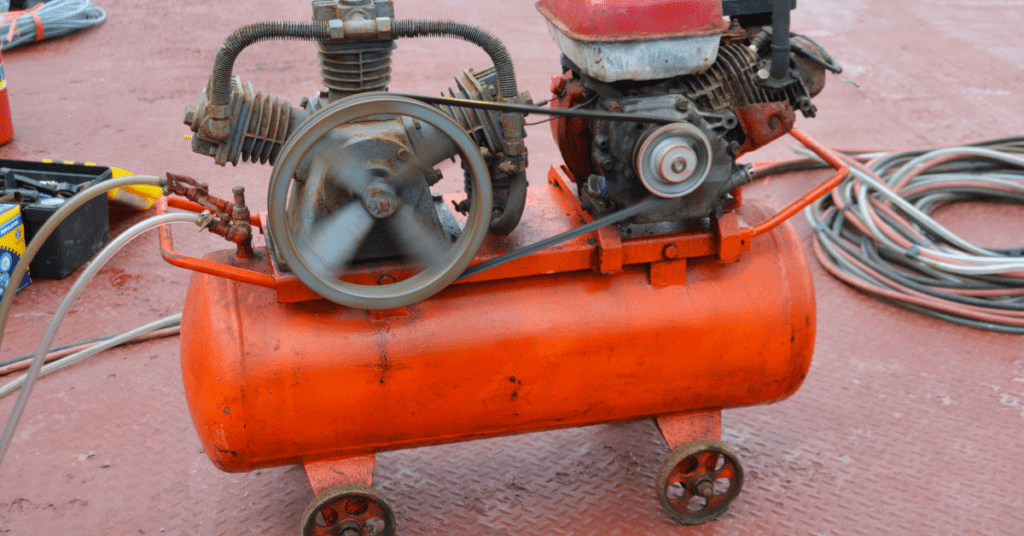
Many air compressor-related issues stem from a neglected drain valve. Typically located on the bottom of the compressor’s tank, the drain valve releases moisture that accumulates inside the tank. Over time, this moisture can cause rust and corrosion, all of which spell trouble for the working parts of your compressor.
You might ask, “How often should I maintain my drain valve?” The frequency of maintenance depends on several factors, including humidity levels in your area and the use of your compressor. A visual inspection should be part of your monthly checklist, with a more thorough cleaning or replacement every 6-12 months.
Assessing Your Air Compressor
Before you begin the replacement process, it’s crucial to assess your air compressor to get an idea of the workspace and the condition of the existing drain valve. To do this:
- Check the make and model: Some compressors have unique features or proprietary parts, so knowing the specifics is good.
- Examine the tank: Look for moisture around the drain valve or any signs of rust, which could indicate a faulty valve.
- Consider the age: Older valves might be more prone to leaks and should be inspected more frequently.
Gathering the Necessary Tools and Replacement Parts
A successful replacement starts with having the right tools at your disposal. Here’s what you’ll need:
- New drain valve (make sure it’s compatible with your compressor)
- Pipe wrench or adjustable wrench
- Teflon tape or pipe sealant
- Safety glasses
- Work gloves
- Brake cleaner or mineral spirits (for cleaning thread tape)
- A sturdy work surface or table
- If you need help determining which replacement valve to use, consult your compressor’s manual or the manufacturer’s website for guidance.
Safety Precautions For Replacing Your Drain Valve
Safety should be your top priority when working with any tools or machinery. Always remember:
- To relieve the pressure, Turn off the compressor and release all the air from the tank by opening the existing drain valve or using an air tool until the tank is empty.
- Wear eye protection: Protective eyewear is essential when handling any part that could be pressurized or may release debris.
- To work in a well-ventilated area: Air compressors can produce harmful carbon monoxide if used in an enclosed space.
Preparing the Work Area
Set up a work area with enough space to comfortably move around. Lay down a clean, dry cloth or paper towel to set parts on during the process. Remember that spilled oil from the compressor can make surfaces slippery, so working over an absorbent pad or with a bucket nearby is best.
7 Easy Steps by Steps Guide for Replacing the Drain Valve
Step 1: Draining the Air Tank
- Please turn off the compressor and unplug it from the power source.
- Engage the safety valve to release any remaining pressure in the tank.
- Once pressure is released, open the current drain valve to allow the tank to empty fully.
Step 2: Locating the Drain Valve
- The drain valve is typically situated at the bottom of the tank. It may have a short nipple that leads to the enclosure for the valve, with a linkage to open the valve from a more accessible location on the compressor.
Step 3: Removing the Old Drain Valve
- Turn the drain valve counterclockwise to unscrew it from the tank using a pipe or adjustable wrench.
- Be prepared for some resistance, especially if the valve has existed for a long time. Apply penetrating oil to the threads if necessary and allow it to sit for a few minutes to ease removal.
- Once the old valve is removed, inspect the threads on the tank. If rusty or damaged, you may need to clean them or re-tap the threads to ensure a secure fit for the new valve.
Step 4: Installing the New Drain Valve
- Before installing the new valve, clean the tank threads with a rag or brush to remove any debris.
- Wrap the threads on the new drain valve with Teflon tape or apply a pipe sealant to improve the seal. Ensure the tape is wrapped where the threads will be turned when tightening to keep it in place.
Step 5: Securing the Valve in Place
- Turn the new drain valve clockwise onto the tank threads by hand to avoid cross-threading.
- Once the valve is finger-tight, use your wrench to tighten it further. Be cautious not to over-tighten, as this could damage the valve or the tank threads.
Step 6: Reconnecting Any Disconnected Components
- If you had to remove any components or disconnect any tubing to access the drain valve, now is the time to put everything back together.
- Double-check that all connections are secure and free from leaks before moving on to the next step.
Step 7: Testing the New Drain Valve
- With all connections secure, plug in your compressor and allow the tank to fill with air.
- Once the tank is pressurized, close the valve and observe for any leaks.
- If there are no leaks, open the valve to drain the tank. Listen for unusual sounds and check for leaks around the new drain valve or any reconnected components.
Ensuring Proper Functionality and Tightness
After completing the replacement, check that the new drain valve operates smoothly and effectively:
- The valve should open fully to allow air and moisture to escape and close tightly to maintain tank pressure.
- If it seems hard to turn or is not sealing correctly, you may need to loosen it and reapply tape or sealant before re-tightening.
Tips for Maintenance and Prolonging the Life of Your Drain Valve
To optimize the life of your new drain valve, follow these maintenance tips:
- Regular checks: Incorporate the drain valve into your normal maintenance routine. Ensure it’s functioning correctly and remains free of debris.
- Keep it dry: Ensure the area around the valve is clean and dry to prevent sticky buildup or corrosion.
- Replace seals and O-rings: If your new drain valve includes additional seals, consider replacing them during your maintenance checks.
Safety Precautions to Follow Throughout the Process
- Work slowly and deliberately: This is not a race. Taking your time can help you avoid mistakes or injuries.
- Keep your workspace organized: Remember where your tools and parts are placed to prevent tripping over misplaced items.
- Remember to clean up: After completing the replacement, store your tools and dispose of any waste responsibly.
Troubleshooting Common Issues
If you encounter any problems, be prepared to troubleshoot:
- Leaks: Leaks around the valve can often be solved by re-tightening or, in some cases, reapplying Teflon tape or sealant.
- Difficulty Draining: If the valve is hard to turn, it may not be sealing properly and could require adjustment, or in severe cases, the replacement itself may need to be replaced.
FAQs For How to Replace the Drain Valve on Air Compressor
How do I choose the right replacement drain valve for my compressor?
Refer to your compressor’s manual or contact the manufacturer for the correct valve model. Valves may be specific to certain tank sizes or compressor types.
Can I replace the drain valve with the tank pressurized?
Replacing the valve or any parts while the tank is pressurized is unsafe. Always release the pressure first, following the outlined safety procedures.
What precautions should I take when replacing the drain valve on the air compressor?
Ensure that the compressor is depressurized and turned off before attempting to replace the drain valve. Additionally, check for any signs of air leaks after installing the new valve to prevent potential issues.
Conclusion
By following this detailed guide, you’ve not only replaced the drain valve on your air compressor but also gained valuable knowledge about its role in the longevity and efficiency of your machine. Your dedication to maintaining your equipment will not only save you money on costly repairs. Still, it will also ensure your tools are always at their best. Remember to stay safe, work methodically, and enjoy the peace of mind of knowing your air compressor is well cared for your future DIY projects, thank you.


