How to Unclog a Spray Paint Nozzle
Do you ever find yourself unable to work on projects that involve spray paint because your nozzle is beyond repair or clogged shut? If this has become a frustrating issue for you, don’t worry there’s an easy way to unclog your spray paint nozzle and get back to work! In this blog post, we’ll show you how to unclog a spray paint nozzle and get back to painting. With just a couple of household materials and some common sense knowledge of tools, soon enough your blocked sprinkler head will be performing like new again. So put down that sandpaper and let us help; it only takes 5 minutes or less if done correctly!
Identify the Type of Spray Paint Nozzle You Have
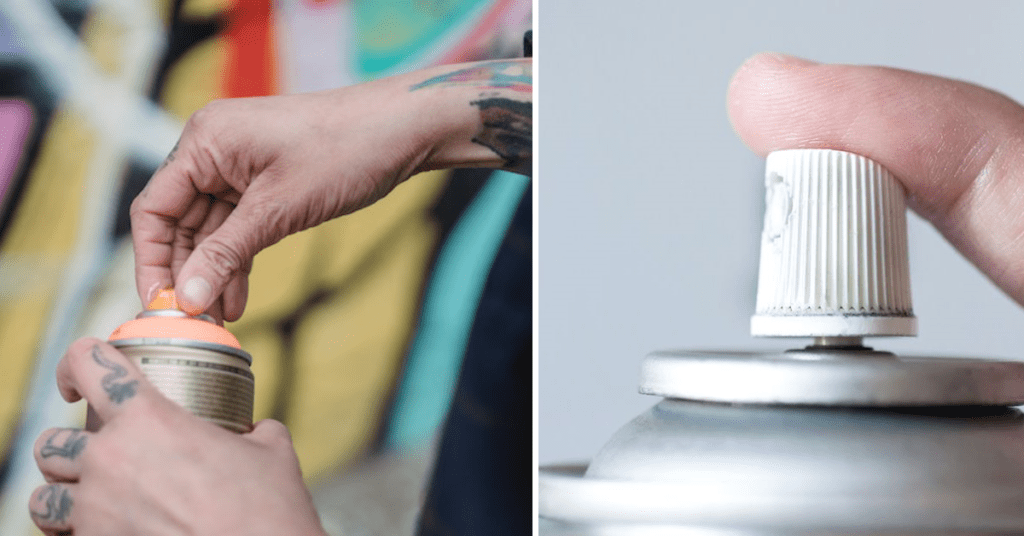
The first step to unclogging your spray paint nozzle is identifying what type of nozzle you have. The two common types of nozzles are a male valve and a female valve. A male valve has threads on the outside and screws into the can, while a female valve has threads on the inside and attaches to the spray gun. Knowing which type you have will help determine what tools and techniques will work best for unclogging it.
Tools and Materials Needed
Before we dive into the steps, make sure you have these tools and materials on hand:
- A small container filled with solvent (such as paint thinner or mineral spirits)
- Safety goggles
- Protective gloves
- A pair of pliers or an adjustable wrench
- A paperclip or safety pin
- A clean cloth or paper towel
Safety Precautions
Before attempting to unclog your spray paint nozzle, it’s important to take proper safety precautions. Make sure you are in a well-ventilated area and wear protective goggles and gloves to avoid any potential contact with the solvent or paint. It’s also a good idea to have a clean cloth or paper towel nearby in case of any spills.
8 Simple Steps to Clear a Clogged Spray Paint Nozzle
Step 1: Removing the Nozzle from the Can
Using your pliers or adjustable wrench, carefully unscrew the nozzle from the spray paint can. Be sure to hold onto the can tightly with your other hand to prevent any accidental spills. Place the nozzle in a small container filled with solvent.
Step 2: Inspecting and Identifying the Clog
Take a closer look at the nozzle and inspect for any visible clogs or debris. Use the paperclip or safety pin to gently scrape away any residue that may be blocking the opening of the nozzle.
Step 3: Clearing the Clog with Solvent
To effectively clear the clog, begin by removing the nozzle from the solvent. Take a clean cloth or paper towel and meticulously wipe away any lingering residue, ensuring a thorough cleaning. If the clog persists, you can explore alternative methods. For instance, employing a toothpick or a small brush, gently dislodge the obstruction. Alternatively, submerging the nozzle in the solvent for a few minutes can aid in loosening up any stubborn clogs, making them easier to remove. By incorporating these additional steps, you can enhance the effectiveness of the clog-clearing process.
Step 4: Using a Cleaning Needle or Pin
If the above steps do not completely unclog your nozzle, you can try using a specialized cleaning needle or pin specifically designed for spray paint nozzles. These cleaning tools are typically made of durable materials and feature a fine, pointed tip that helps dislodge stubborn debris.
To use the cleaning needle or pin, carefully insert it into the nozzle opening, ensuring that you do not force it or cause any damage. Once inserted, gently twist the needle or pin to loosen and remove any remaining clogs or particles that may be obstructing the flow of paint.
By employing this additional method, you can effectively tackle even the most stubborn clogs and ensure optimal performance of your spray paint nozzle.
Step 5: Soaking in Solvent Overnight
In some cases, particularly if the nozzle has been clogged for a longer period, it may be necessary to soak it in solvent overnight. This will allow the solvent to fully penetrate and dissolve any hardened or stubborn debris that may be causing the clog.
Before soaking your nozzle, make sure you have a well-ventilated area and follow proper safety precautions as mentioned earlier. After soaking overnight, use a clean cloth or paper towel to thoroughly wipe away any remaining residue and test the nozzle’s functionality before reattaching it to the spray paint can.
Step 6: Blowing Compressed Air
One highly effective method for unclogging a spray paint nozzle is by using compressed air to blow out any debris or obstructions. If you have access to compressed air, this technique can provide excellent results. To begin, attach the can of compressed air to the nozzle. With a gentle yet firm grip, give the can a few quick bursts, directing the airflow towards the nozzle. The force of the compressed air will dislodge and remove any visible clogs, ensuring optimal spray performance. Take care to thoroughly inspect the nozzle after each burst, ensuring that all debris is cleared. This method is particularly useful for tackling stubborn or persistent clogs, and can significantly extend the lifespan of your spray paint equipment.
Step 7: Reassembling the Nozzle
After successfully unclogging your spray paint nozzle, carefully reattach it to the can. Ensure that it is tightened securely and give the can a quick test spray to confirm that the nozzle is fully functional. If the spray is uneven or inconsistent, repeat the unclogging process until it operates smoothly.
Step 8: Reattaching the Nozzle to the Spray Gun
If you removed a female valve nozzle from the spray gun, simply screw it back onto the gun’s threaded end. If you have a male valve nozzle, attach it by pushing down and twisting clockwise until it is tightly secured. Congratulations! You have successfully unclogged your spray paint nozzle and can now resume your project.
Testing the Spray Paint Can
Congratulations on successfully unclogging your spray paint nozzle! Your can is now ready for use. Before diving into your project, it’s always a good idea to perform a quick test on a scrap piece of material. This will help ensure that the nozzle is functioning properly and that the paint is spraying evenly.
To conduct the test, hold the can at a distance of about 6 to 8 inches from the surface. Press the nozzle down gently and move your hand in a smooth, sweeping motion. Observe the spray pattern and consistency of the paint. If you notice any irregularities or issues, such as sputtering or uneven coverage, don’t worry! Simply repeat the steps of unclogging the nozzle or consider trying a different brand of spray paint for future projects.
Remember, taking the time to test your spray paint before starting your project can save you frustration and ensure a successful outcome. Happy painting!
Tips and Tricks on Clearing a Clogged Spray Paint Nozzle
- Regularly clean and maintain your spray paint equipment to prevent clogs from forming.
- Avoid using low-quality or old spray paint, as these are more prone to causing clogs.
- If you have a particularly stubborn clog, try a combination of the above steps for best results.
- Consider using a nozzle cleaner or lubricant to prevent future clogs and keep your equipment in top shape.
- Always follow proper safety precautions when handling solvents and other chemicals.
By following these tips and tricks, you can easily and effectively clear clogged spray paint nozzles, ensuring a smooth and hassle-free painting experience every time.
4 Preventive Measures to Avoid Nozzle Clogs
It’s always best to prevent nozzle clogs from happening in the first place. Here are some additional measures you can take to avoid them:
- If possible, use high-quality spray paint with a reputation for not clogging.
- Before using a new can of spray paint, test it on a scrap piece of material to ensure that the nozzle is working properly.
- Avoid spraying in extreme temperatures or humid conditions as this can affect the performance of the spray paint.
- Clean your spray gun regularly to prevent any buildup or clogging within the mechanism.
By following these preventive measures, you can save yourself time and frustration by avoiding nozzle clogs altogether. Happy painting!
FAQs on Clearing a Clogged Spray Paint Nozzle
Can I use water to clean my spray paint nozzle?
No, it is not recommended to use water as it may cause the paint to harden and clog the nozzle further. It is best to use a solvent specifically designed for cleaning spray paint nozzles.
How often should I clean my spray gun and nozzle?
It is recommended to clean your spray gun and nozzle after each use. This will prevent any buildup or clogging and ensure optimal performance for future projects.
Can I reuse a clogged nozzle?
No, it is not recommended to reuse a clogged nozzle as it can affect the quality of your spray paint and potentially cause further clogs. Always use a clean and unclogged nozzle for best results.
Can I use my cleaning tools to unclog the nozzle?
Yes, you can use a toothpick or small brush as mentioned in step 3. However, it is recommended to also have specialized cleaning tools such as a needle or pin for more stubborn clogs.
Conclusion
Overall, if your spray paint nozzle becomes blocked, you now know how to unclog it. Firstly, using the right tools and materials is essential to ensure that you can safely complete the task. Secondly, with some patience and a bit of technical know-how, you’ll be able to get your project moving again. Before beginning any spraying tasks afterward, it’s wise to check for any standard maintenance issues.
Finally, make sure to test out your product by painting it on an old piece of cardboard or paper before splattering it away onto your project! By following these sensical steps and taking all necessary precautions for safety when tackling a clogged or blocked spray paint nozzle, you’ll be back in business with no hiccup!
