

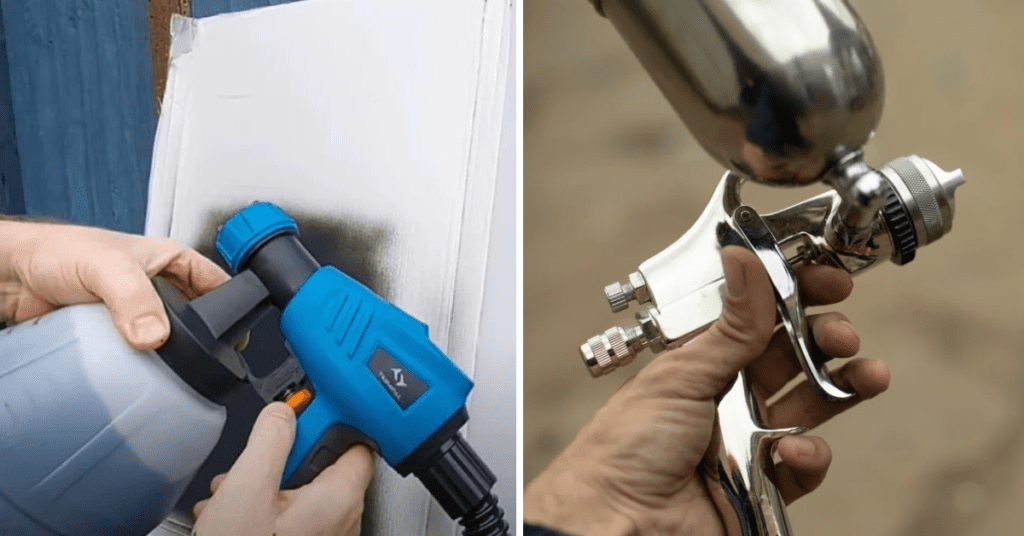
How to Clean an Electric Paint Sprayer
Are you wondering how to clean an electric paint sprayer? Cleaning your paint sprayer correctly is essential for keeping it running smoothly and preventing clogs. Without proper maintenance, even the best quality electric paint sprayers can easily become nothing more than a costly paperweight. Fortunately, with the right supplies and a bit of know-how, cleaning your electric paint sprayer doesn’t need to be a time-consuming chore! In this blog post, we’ll walk you through how to clean an electric paint sprayer easily so that it runs like new each time you use it.
Importance of Cleaning an Electric Paint Sprayer
Cleaning your electric paint sprayer after each use is crucial for several reasons. Firstly, it prevents dried paint from building up in the machine and clogging the nozzle. When the nozzle gets clogged, your sprayer’s performance will be affected, resulting in uneven spraying or even complete malfunction. Secondly, regular cleaning extends the lifespan of your paint sprayer by preventing corrosion and other damage caused by dried paint. Lastly, keeping your paint sprayer clean ensures that you achieve a smooth and professional finish each time you use it.
Tools and Materials Needed
Before we dive into the cleaning process, here are some essential tools and materials you will need:
- Warm water
- Mild dish soap or paint thinner (depending on your paint type)
- A bucket or container for soaking parts
- Cleaning brushes (small toothbrushes work well)
- Clean towels or rags
- Gloves (optional)
- Safety goggles (optional)
Now that you have all the necessary supplies, let’s get started on cleaning your electric paint sprayer!
Safety Precautions
Before starting the cleaning process, it is crucial to take a few important steps to ensure safety and effectiveness. First, remember to unplug your paint sprayer from the power source to avoid any electrical hazards. Next, release any built-up pressure by carefully spraying into a waste container, as this will prevent any unexpected discharge during cleaning.
Additionally, it is highly recommended to wear gloves and safety goggles throughout the cleaning process. This will provide an extra layer of protection for your skin and eyes, guarding against any potential contact with chemical cleaners or other harmful substances. By taking these precautions, you can ensure a safer and more efficient cleaning experience.
11 Easy Steps for Cleaning an Electric Paint Sprayer
Step 1: Preparing the Workspace
Before you begin the cleaning process, it is important to select a well-ventilated and open area for your workspace. Find a location that provides ample space and allows for easy movement. Consider laying down old towels or plastic sheets to safeguard the surface from any possible paint spills or drips, ensuring that your workspace remains clean and protected throughout the task. Taking these steps will not only help you maintain a tidy environment but also make the cleaning process more efficient and enjoyable.
Step 2: Emptying the Paint Container
To begin, carefully pour out any remaining paint from the container. Take your time and ensure that you have emptied it completely. If you find that there is a significant amount of paint left, you may want to consider using a separate container to store it for future touch-ups or projects. This way, you can make the most out of your leftover paint and avoid any unnecessary waste. Remember, proper paint disposal is important for both the environment and your budget. So, take a moment to ensure that your paint container is emptied and any excess paint is safely stored for future use.
Step 3: Disassembling the Sprayer Components
To start the disassembly process, carefully detach the spray tip, nozzle guard, and filter from your paint sprayer. Take your time and handle them gently during this step. If you’re unsure about the disassembly procedure, always refer to the manufacturer’s comprehensive instructions for proper and safe disassembly. By diligently following these steps, you’ll be well-prepared to proceed with the subsequent stages of maintaining your paint sprayer.
Step 4: Preparing a Cleaning Solution
To effectively clean your tools, start by getting a clean bucket or container. Fill it with warm water and choose a cleaning agent based on the type of paint you use. For water-based paints, mild dish soap works wonders, while paint thinner is ideal for oil-based paints. Make sure to refer to the recommended ratios mentioned on the cleaning product’s label for best results. Having the right cleaning solution will ensure your tools stay in great condition and are ready for future projects!
Step 5: Cleaning the Paint Container and Filter
To ensure thorough cleaning, start by soaking the paint container and filter in the cleaning solution for approximately 10 minutes. This allows the solution to effectively loosen any dried paint, making it easier to remove. After the soaking period, take a cleaning brush and gently scrub away any remaining residue, leaving your paint container and filter spotless and ready for future use.
Step 6: Cleaning the Remaining Parts Spray Gun
After cleaning the container and filter, it’s time to shift our focus toward the remaining components of your spray gun. Submerge them gently in the cleaning solution for about 15 minutes. Next, take a cleaning brush and delicately scrub each part to ensure complete removal of any paint residue. For those hard-to-reach nooks and crannies, employ a small toothbrush or pipe cleaners to meticulously eliminate any buildup. Once all the parts have been thoroughly cleaned, rinse them with fresh water and dry them using a towel or rag.
Step 7: Cleaning the Nozzle and Tip
To ensure optimal performance, it is important to properly clean the nozzle and tip of your device. Start by soaking the nozzle and tip in the cleaning solution for approximately 10 minutes. This will help loosen any paint build-up and make it easier to remove. After soaking, take a small brush and gently scrub both the inside and outside of these components, ensuring that all traces of paint are thoroughly removed. Taking the time to clean these parts will help maintain the longevity and efficiency of your device.
Step 8: Cleaning the Air Compressor (if applicable)
Proper maintenance of the air compressor is vital for the optimal performance of your electric paint sprayer. Neglecting this essential component can result in decreased efficiency and potential damage. To ensure top-notch functionality, it is highly recommended that you meticulously adhere to the manufacturer’s instructions for cleaning. This may involve disassembling certain parts, utilizing specific cleaning solutions, and performing routine maintenance tasks. By dedicating time and effort to the cleaning process, you can extend the lifespan of your paint sprayer and consistently achieve high-quality results in your painting projects.
Step 9: Rinsing and Drying
Once all the components have been cleaned meticulously, it is crucial to rinse them thoroughly with clean water to ensure the removal of any lingering cleaning solution. Take your time and make sure each part is completely rinsed, leaving no trace of the solution behind.
After rinsing, gently dry each component using a soft towel or rag. Ensure that every part is dried completely, as any moisture left behind may lead to potential issues in the future. Taking the extra time to ensure thorough rinsing and drying will help maintain the longevity and optimal performance of the components.
Step 10: Reassembling the Sprayer
Once all the components are completely dry, carefully and methodically reassemble your electric paint sprayer, following each step of the manufacturer’s instructions. Take your time to ensure that each piece is aligned and fitted properly, as this will contribute to the optimal performance and longevity of your sprayer. By paying attention to the finer details during the reassembly process, you can guarantee that your sprayer will be ready to deliver flawless and professional results for your painting projects.
Step 11: Flushing the System with a Cleaning Solution (optional)
To achieve a thorough clean, you can enhance the maintenance of your paint sprayer by running a specially formulated cleaning solution through the system. This process effectively eliminates any lingering paint or debris that may have accumulated over multiple uses, ensuring optimal performance and longevity of your equipment. It is highly recommended to carefully follow the manufacturer’s instructions and guidelines for this cleaning procedure to ensure safe and effective results.
Proper Disposal of Cleaning Materials
Once you have finished cleaning your electric paint sprayer, it is essential to dispose of any leftover paint or cleaning materials properly. Check with your local waste management guidelines for proper disposal methods. Do not pour any leftover paint or cleaning solution down the drain, as this can harm the environment.
Regular Maintenance Tips
To keep your electric paint sprayer in top condition, make sure to follow these maintenance tips:
- Clean the nozzle and tip after each use.
- Use appropriate cleaning solutions for the type of paint you are using.
- Replace worn or damaged parts promptly.
- Store your paint sprayer in a clean and dry area.
Troubleshooting Common Issues
If you encounter any issues with your electric paint sprayer’s performance, try these troubleshooting tips:
- Check for clogs in the nozzle or tip and clean them if necessary.
- Ensure all components are assembled correctly.
- Make sure there is enough pressure and proper air supply to the spray gun.
- If using a new paint type, make sure to use the appropriate cleaning solution for that paint.
With proper maintenance and cleaning, your electric paint sprayer can last for many years, providing you with smooth and professional results every time.
FAQs on Cleaning an Electric Paint Sprayer
How often should I clean my electric paint sprayer?
It is recommended to clean your paint sprayer after each use, especially if using different types of paint. However, a deeper cleaning can be done every 3-6 months.
Are there any alternative cleaning solutions I can use?
Yes, you can also use mineral spirits or acetone as cleaning solutions for your paint sprayer. Just make sure to follow the recommended ratios on the product label.
Can I use a pressure washer to clean my electric paint sprayer?
No, it is not recommended to use a pressure washer as it can damage the delicate components of your paint sprayer. Stick to using mild cleaning solutions and brushes for best results.
Can I store my electric paint sprayer with leftover paint in the container?
No, it is not recommended to leave leftover paint in the container as it can dry and clog the sprayer’s components. Store any remaining paint in a separate container for future use.
What should I do if my electric paint sprayer is not spraying evenly?
Check for any clogs in the nozzle or tip and clean them if necessary. You can also try adjusting the spray pattern settings on your sprayer. If the issue persists, refer to the manufacturer’s troubleshooting guide or contact their customer support.
Conclusion
In conclusion, proper cleaning and maintenance of an electric paint sprayer is essential to ensuring the longevity of its use and ensuring that the finished product looks exactly as desired. Furthermore, it is important to follow safety precautions when disassembling and assembling the parts of your paint sprayer, as well as during use. After completing regular maintenance on your equipment, be sure to dispose of all used materials in a responsible manner to protect yourself and the environment.
If you experience any issues with your paint sprayer, consult the user’s manual and use the troubleshooting tips provided in this blog to help diagnose and fix any common problems. Properly cleaning and maintaining an electric paint sprayer can make a difference when painting projects require intricate detail or large areas that must be covered quickly.


