

How to Hang Stockings on a Wall Without Nails
Are you looking for the perfect way to hang your beautiful holiday stockings this season without having to rely on nails or other tools that could potentially damage your walls? Look no further! By simply investing in a few materials, easy-to-follow instructions and an hour of your time, you can create a festive and decorative look within any room. In this blog post, we will show you how to hang stockings on a wall without nails, using just a few common household items. we will discuss the simple steps involved when it comes to displaying your winter wonderland decorations safely – read on to find out how easy it is!
Choosing the Right Location and Wall Surface
The first step to hanging stockings without nails is to choose the right location and wall surface. You will want to ensure that the area where you plan on hanging your stockings is clean, dry and smooth. Avoid walls with wallpaper or any other uneven surface as this could make the stockings slip or fall.
Tools and Materials Needed for Hanging Stockings
Before you get started, make sure you have all of the necessary tools and materials ready. This will save you time and hassle in the long run! Here is a quick list of what you will need:
- Command hooks or adhesive strips (depending on your preference)
- Measuring tape or ruler
- Pencil
- Decorative ribbon or string
- Stockings
- Scissors
- Optional: level for precise placement
Safety Precautions for Hanging Stockings
Even though we are not using nails, it is important to still take safety precautions when hanging decorations. First and foremost, make sure the surface you are attaching your command hooks or adhesive strips is clean and dry. This will ensure a strong hold and prevent any accidents from occurring. Additionally, make sure to carefully read and follow the instructions on the packaging of your chosen adhesive. Most brands will list any potential hazards or warnings, so be sure to take note of them before getting started. Lastly, always use caution when using scissors or any sharp objects.
5 Easy Methods for Hanging Stockings Without Nails
Method 1: Adhesive Hooks
For this method, we will be using adhesive hooks to hang our stockings. Follow these simple steps:
- Measure and mark where you want your stockings to hang on the wall with a pencil.
- Clean and dry the surface of the wall where you will be placing the adhesive hooks.
- Remove one side of the adhesive backing from the hook and firmly press it onto the wall in the marked location.
- Repeat with the other side of the adhesive backing and press firmly.
- Wait at least one hour before hanging your stockings to ensure a strong hold.
- Tie a decorative ribbon or string onto each hook, leaving enough length for your desired stocking placement.
- Hang your stockings on the ribbon or string and adjust as needed.
- Optional: use a level to ensure the stockings are hanging evenly.
Method 2: Command Strips
Command strips are another popular option for hanging stockings without nails. Follow these steps:
- Measure and mark where you want your stockings to hang on the wall with a pencil.
- Clean and dry the surface of the wall where you will be placing the command strips.
- Remove one side of the adhesive backing from a strip and press it onto the wall in the marked location.
- Repeat with another strip and place it directly above or below the first strip, depending on your desired stocking placement.
- Wait at least one hour before hanging your stockings to ensure a strong hold.
- Tie a decorative ribbon or string onto each strip, leaving enough length for your desired stocking placement.
- Hang your stockings on the ribbon or string and adjust as needed.
- Optional: use a level to ensure the stockings are hanging evenly.
Method 3: Tension Rods
If you don’t want to use adhesive, tension rods are a great alternative. Follow these steps:
- Measure and mark where you want your stockings to hang on the wall with a pencil.
- Install two tension rods in the desired location, making sure they are secure and at least 6 inches apart.
- Tie decorative ribbon or string onto each rod, leaving enough length for your desired stocking placement.
- Hang your stockings on the ribbon or string and adjust as needed.
- Optional: use a level to ensure the stockings are hanging evenly.
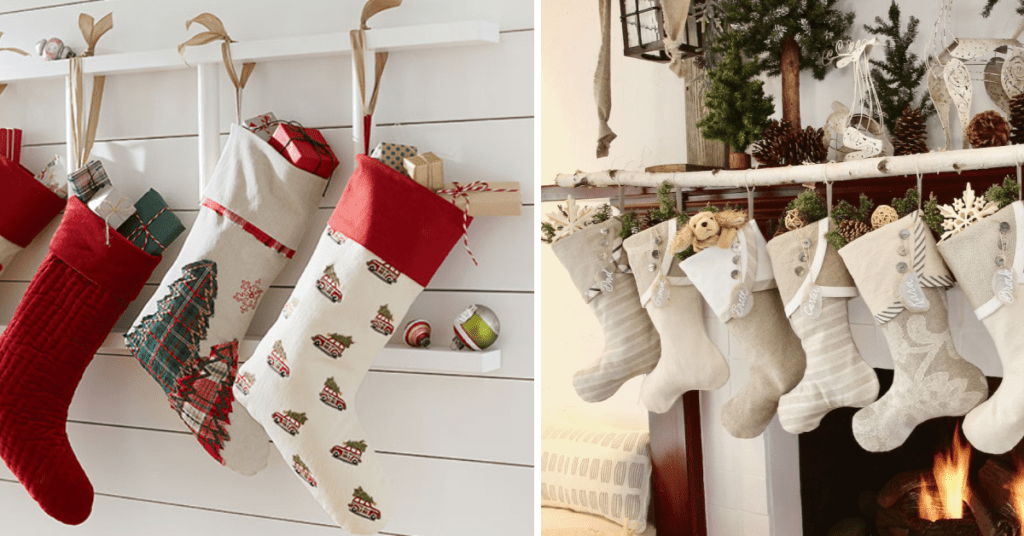
Method 4: Mantel or Ledge
If you have a mantel or ledge in your home, this method may be the easiest for you. Follow these steps:
- Measure and mark where you want your stockings to hang on the mantel or ledge with a pencil.
- Use decorative hooks or clips to hang the stockings on.
- Adjust as needed to make sure they are evenly spaced.
- Optional: use a level to ensure the stockings are hanging evenly.
Method 5: Wall-Mounted Stocking Holder
If you want a more permanent solution, you can purchase a wall-mounted stocking holder. Follow these steps:
- Choose the desired location on your wall and mark it with a pencil.
- Install the mounting hardware according to the instructions provided.
- Hang your stockings on the hooks or clips provided.
- Adjust as needed to make sure they are evenly spaced.
- Optional: use a level to ensure the stockings are hanging evenly.
Decorating Your Stockings
Now that your stockings are securely hanging on the wall, it’s time to make them look even more festive and personalized. Here are a few ideas:
- Add name tags or initials to each stocking using glitter glue or iron-on letters.
- Fill the stockings with small gifts, treats or handwritten notes for your loved ones.
- Hang fairy lights around the top of the stockings for an extra touch of sparkle.
- Use festive ribbons or bows to tie around the top of each stocking.
- Attach small ornaments or other decorations to the stockings using hot glue or clips.
With these simple methods and decorating ideas, you can create a beautiful display of stockings without damaging your walls. Happy decorating!
Common Issues and Solutions
If you encounter any issues while hanging your stockings, don’t panic. Here are some common problems and easy solutions:
- Adhesive not sticking: Make sure the surface is clean and dry before applying the adhesive. If it still doesn’t work, try using a stronger adhesive or switch to a different method.
- Uneven stocking placement: Use a level for precise placement or adjust the ribbon/rod/hook until it looks even to your eye.
- Stocking slipping off: Make sure the adhesive is fully adhered and consider using a clip or tying the stocking onto the hook/rod for extra security.
- Damage to walls: If you accidentally damage your walls while trying these methods, use spackle and touch-up paint to fix any holes or marks. Remember to always use caution when using any sharp objects.
Now go forth and create a beautiful and hassle-free display of Christmas stockings in your home! Happy holidays.
Tips for Secure and Creative Display
- If using command hooks or strips, make sure to follow the weight limit listed on the packaging. Overloaded hooks can cause them to fall off the wall.
- Use different colored stockings for a more colorful display.
- Hang your stockings at varying heights for a more dynamic look.
- If you have pets, make sure to hang your stockings out of their reach. You don’t want them to accidentally knock them down!
- Don’t be afraid to get creative with your decorating ideas and make your stockings unique.
- Take pictures of your finished display for a memorable holiday keepsake. Happy hanging!
You can also read How to Install Zinc Roof Strips Without Nails.
FAQs on Hanging Christmas Stockings Without Nails
Can I hang my stockings on a brick or concrete wall using these methods?
These methods are best suited for hanging stockings on smooth surfaces such as drywall, wood, or tile. For brick or concrete walls, you may need to use drill-in hooks or other specialized hardware designed for those types of surfaces.
Can I reuse the command strips or hooks after taking them down?
Yes, as long as they are still sticky and in good condition. Just make sure to follow the instructions for removing them carefully to avoid damaging your walls.
Is there a weight limit for using tension rods?
Yes, tension rods have a weight limit and should not be overloaded with heavy stockings or other items.
Can I hang my stockings on a door using these methods?
While you could potentially use some of these methods on a door, it may not be the most secure option as doors tend to move and shift more than walls. Consider using a door hanger or over-the-door hook specifically designed for hanging stockings instead.
Will adhesive strips or hooks damage my walls?
If used and removed correctly, adhesive strips or hooks should not cause any damage to your walls. However, always use caution and follow the instructions carefully to avoid any potential damage.
Can I hang stockings without using any hardware at all?
While it is possible to hang stockings without using nails or other hardware, it may not be as secure and could potentially damage your walls if the stockings are heavy. It’s always best to use some form of hardware for a secure display.
Conclusion
In conclusion, there are many methods and tools that you can use to hang stockings from the mantel without any nails or wall-damaging hooks. Whether you choose to use a stocking holder, ribbons, string, or even plain ole gravity with an evergreen branch, you can easily create a festive look this holiday season that will add that extra touch of cheer. Don’t forget to include your favorite decorations to personalize your stockings and make them look merry and bright!
If you need additional supplies for this project or have questions on how to do it safely, be sure to contact your local hardware store so that you can get all the answers you need quickly while still being able to have fun crafting this special holiday decoration. Now go out and make some beautiful hanging stockings for your loved ones with no trepidation!


