

How to Use a Porter Cable Air Compressor
Are you wondering how to use a Porter Cable air compressor? Whether you’re trying to get your home project done quickly or tackling big jobs at the worksite, an air compressor can make them much easier. But with so many different types of air compressors available, it can be hard to decide which one is right for you. One type of highly reliable compressor is the Porter Cable Air Compressor a durable and powerful machine with plenty of benefits.
While there is a learning curve with all new tools, it doesn’t need to be difficult, this step-by-step guide will have you easily using your Porter Cable air compressor in no time. In this blog post, we’ll show you how to use a Porter Cable air compressor, so you can get the most out of this handy tool.
Safety Precautions for Using a Porter Cable Air Compressor
Before we dive into the steps for using a Porter Cable air compressor, it’s essential to go over some safety precautions. While air compressors are relatively safe tools, they can still cause harm if not used properly. Here are some things to keep in mind:
- Always wear appropriate protective gear, such as safety glasses and earplugs.
- Make sure your workspace is well-ventilated to prevent any build-up of fumes.
- Read the instruction manual carefully before use.
- Keep your fingers and loose clothing away from moving parts of the compressor.
- Never point the air nozzle at yourself or others.
- Always shut off and unplug the compressor before performing any maintenance or cleaning tasks.
- Regularly check for any damaged or worn-out parts and replace them immediately.
By following these safety precautions, you can ensure a safe and worry-free experience while using your Porter Cable air compressor.
Getting Started: Setting Up Your Porter Cable Air Compressor
Before you can start using your air compressor, it’s crucial to set it up correctly. Here are the steps to follow:
Step 1: Choosing a Suitable Location
First, you’ll need to find a suitable location for your air compressor. Make sure the area is well-ventilated and has enough space for the compressor to operate safely. Also, ensure that there are no flammable materials nearby.
Step 2: Plugging In the Compressor
Once you have identified a suitable location, carefully position your air compressor near a grounded outlet. Make sure to select an outlet that can accommodate the power requirements of your compressor. If necessary, utilize a properly rated extension cord designed to handle the specific power needs of your air compressor. By taking these precautions, you can ensure the safe and efficient operation of your equipment.
Step 3: Adjusting the Pressure Regulator
Before turning on the compressor, adjust the pressure regulator to your desired level. This will depend on the type of work you’ll be doing, so make sure to refer to your instruction manual for guidance.
Step 4: Filling Up the Tank
After adjusting the pressure regulator, turn on the compressor and let it fill up its tank. Once it reaches its recommended pressure level, the compressor will automatically shut off.
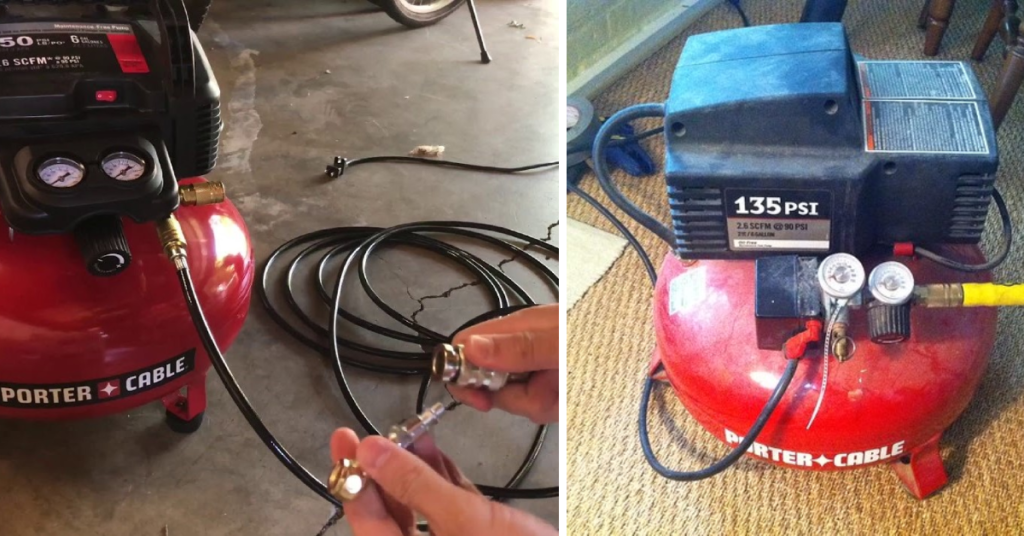
Understanding the Controls and Components of a Porter Cable Air Compressor
To use your air compressor efficiently, it’s important to understand its controls and components. Here are the main parts you need to know about:
- Pressure Gauge: This displays the current pressure level in the tank.
- Regulator Knob: This controls the amount of pressure released from the tank.
- Tank Drain Valve: This is used to drain any excess moisture that may build up in the tank.
- On/Off Switch: This turns the compressor on and off.
- Air Outlet Valve: This allows you to control the airflow from the compressor.
5 Easy Step-by-Step Guide for Starting and Operating the Porter Cable Air Compressor
Now that you’re familiar with the safety precautions and components of a Porter Cable air compressor, let’s take a closer look at how to start and operate it:
Step 1: Begin by Plugging In the Compressor
As mentioned earlier, it is crucial to connect your compressor to a properly grounded outlet to ensure safe operation. By doing so, you can effectively protect yourself and your equipment from electrical hazards. Additionally, if you are using an extension cord, make sure it is of sufficient length and gauge to handle the power requirements of your compressor. This will help maintain optimal performance and prevent any potential issues that may arise from inadequate power supply.
Step 2: Turn On the Compressor
Once you have plugged in the compressor, locate the on/off switch and turn it on. As the compressor starts up, you should hear a low, steady humming sound, indicating that it is successfully powering up and getting ready to perform its intended function.
Step 3: Adjusting the Pressure Regulator
Before using the air compressor, you’ll need to adjust the pressure regulator to your desired level. This is typically done by turning the regulator knob clockwise to increase the pressure and counterclockwise to decrease it. Take your time to find the perfect setting, ensuring that it aligns with the specific requirements of your task. By fine-tuning the pressure, you can optimize the compressor’s performance and achieve the best results for your project.
Step 4: Connect Your Tools
Once you’ve adjusted the pressure to the desired level, you can confidently connect your tools to the air outlet valve. Take a moment to ensure they are securely attached, providing a firm and reliable connection. This attention to detail will ensure optimal performance and safety when using your tools.
Step 5: Begin Using Your Air Compressor
With everything connected and ready to go, you can now start using your Porter Cable air compressor. Simply turn on your tool, ensuring a secure connection, and adjust the regulator knob as needed to achieve the desired pressure level. Take a moment to familiarize yourself with the clear pressure gauge and the ease of use. Enjoy the reliability and efficiency of your Porter Cable air compressor as you tackle various tasks with confidence.
Shutting Down the Air Compressor
When you’re done using the air compressor, it’s important to shut it down properly. This will help prolong its lifespan and ensure safe operation in future uses. Here are the steps to follow:
- Turn off your tools and disconnect them from the air outlet valve.
- Release any remaining pressure in the tank by opening the drain valve.
- Once all pressure is released, close the drain valve.
- Turn off the compressor by flipping the on/off switch to its “off” position.
By following these steps, you can safely and effectively shut down your air compressor after use.
Proper Maintenance and Care for Your Porter Cable Air Compressor
To keep your Porter Cable air compressor running smoothly and efficiently, it’s important to perform regular maintenance. Here are some tips to help you maintain your air compressor:
- Check and change the oil regularly (if applicable).
- Keep all components clean, including the tank, pressure gauge, regulator knob, and drain valve.
- Inspect for any leaks or damage before each use.
- Store the compressor in a dry, well-ventilated area when not in use.
By taking proper care of your air compressor, you can ensure its longevity and optimal performance for all your projects. Follow these maintenance tips to get the most out of your Porter Cable air compressor.
Troubleshooting Common Issues with Porter Cable Air Compressors
Even with proper maintenance, you may encounter some issues with your air compressor. Here are some common problems and their potential solutions:
- Compressor not turning on: Check the power supply and make sure it is properly connected to a grounded outlet. If using an extension cord, ensure it is rated for your compressor’s power needs.
- Low-pressure output: Make sure the regulator knob is adjusted to the correct pressure setting. Check for any obstructions or clogs in the air hose.
- Oil leaks: Inspect the compressor for any cracks or damage that may be causing the leak. If necessary, replace damaged parts and tighten all connections.
If you are unable to resolve any issues on your own, it’s always best to consult a professional for assistance.
FAQs on Porter Cable Air Compressors
How often should I change the oil on my Porter Cable air compressor?
It is recommended to change the oil after every 50 hours of use, or at least once a year.
Can I use my Porter Cable air compressor for painting?
Yes, you can use your air compressor for painting. Just make sure to use an appropriate spray gun and follow all safety precautions.
Can I use my Porter Cable air compressor in extreme temperatures?
No, it is not recommended to operate your air compressor in very hot or cold temperatures as it can affect its performance and lifespan.
Can I use my air compressor in wet conditions?
No, it is not safe to operate an air compressor in wet conditions. Always keep your compressor and all electrical equipment dry.
Conclusion
In conclusion, safety is paramount when working with a Porter Cable air compressor. Taking the time to set up, familiarize yourself with the controls, and choose the right tools for your project helps ensure that you are properly prepared for any task. Starting and operating an air compressor takes some knowledge and practice, but following these steps will help you along the way.
After finishing your project, make sure to turn off the compressor as well as all connected tools before leaving the area. Doing so will not only prevent hazards from occurring while using a Porter Cable air compressor but also allow you to complete tasks quicker and more effectively in the future. Ready to start on your next project? Get started now with these safety tips!


