

How to Clean an Air Compressor Tank
Do you need to find out how to clean an air compressor tank? If your tank has become clogged or contaminated, it can lead to decreased efficiency and potentially catastrophic failure. Taking time for regular maintenance and cleaning is the best way to ensure that your air compressor provides adequate performance while at the same time avoiding potential problems.
In this blog post, we will explain exactly how to deep-clean a compressed air system for optimal function. We’ll go through step-by-step instructions so that even if you’ve never done any work on an air compressor before, the process should be easy enough for you to tackle yourself. Start reading now and get preventative advice about troubleshooting common problems related to improperly maintained systems!
Understand Why and When to Clean an Air Compressor Tank
The air compressor tank is responsible for storing compressed air, a critical component of the entire system. Over time, debris and moisture can build up inside the tank and contaminate the stored air. When this happens, it affects the performance of your compressor and can cause serious damage if left untreated. Regularly cleaning your air compressor tank is essential to maintain its functionality and prevent potential hazards. The frequency of cleaning will depend on the type of compressor you have and how often it is used, but generally, it is recommended to clean your tank at least once a year.
Evaluate the Condition of the Air Compressor Tank Before Starting to Cleaning
Before diving into the cleaning process, it’s important to assess the condition of your air compressor tank. Inspect for any visible signs of damage or corrosion and make sure that all valves, gauges, and connections are in good working condition. If you notice any issues, it’s best to address them before proceeding with the cleaning. Also, be sure to release all pressure from the tank before starting any maintenance work.
Prepare All Necessary Cleaning Supplies and Safety Equipment
To properly clean an air compressor tank, you will need specific cleaning supplies and safety equipment. Some of the items you should have on hand include:
- A degreaser or detergent specifically designed for air compressors
- A brush with stiff bristles or a wire brush
- Safety goggles and gloves
- Absorbent rags or towels
- An air compressor oil
- A compressor oil filter
- Water and a hose (if necessary)
Now that you have all the necessary supplies and safety equipment, you are ready to start cleaning your air compressor tank.
Safety Precautions for Cleaning an Air Compressor Tank
Cleaning an air compressor tank can be a hazardous task, so it’s essential to take proper precautions before and during the process. Here are some safety measures you should follow:
- Wear protective gear such as goggles and gloves to protect yourself from any debris or chemicals.
- Always release all pressure from the tank before starting any maintenance work.
- Make sure to handle all cleaning products and chemicals with care, following the manufacturer’s instructions.
- Do not use any flammable or combustible cleaners inside the tank.
- Avoid using any sharp tools that could damage the tank or its components.
9 Easy Step-by-Step Guide to Cleaning an Air Compressor Tank
Now that you have taken all the necessary safety precautions, it’s time to start the cleaning process. Here is a step-by-step guide on how to clean an air compressor tank:
Step 1: Disconnecting and Draining the Compressor Tank
First, unplug the air compressor from the power source and turn off any valves or switches that supply air to the tank. Next, open the drain valve at the bottom of the tank and let all of the remaining compressed air escape. If your tank has a water drain valve, make sure to drain out any moisture as well.
Step 2: Removing Residual Air Pressure
After draining the tank, use an air blow gun to remove any remaining moisture or debris from the tank’s walls and bottom. If you don’t have access to an air blow gun, you can also use a wet/dry vacuum cleaner for this step.
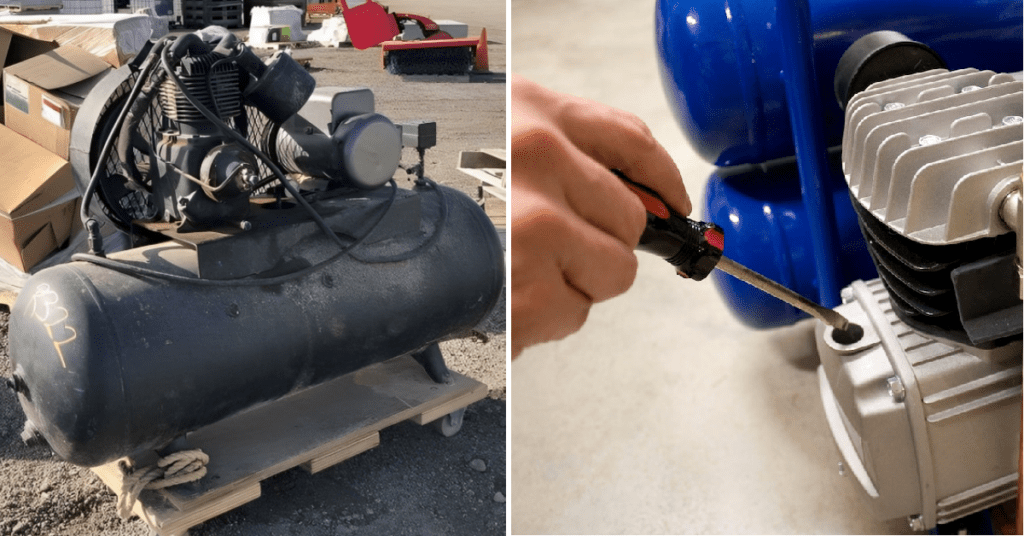
Step 3: Removing the Tank Drain Valve
To begin, using an appropriately sized wrench, gently and meticulously remove the tank drain valve. Take care to handle it with caution and precision. Once removed, thoroughly cleanse the valve using a suitable degreaser or detergent, ensuring all residue and contaminants are effectively eliminated. Afterward, it is crucial to allow the valve to dry completely, leaving no moisture behind. Finally, when the valve is completely dry, reattach it securely to the tank, ensuring a tight and reliable connection.
Step 4: Cleaning the Tank Interior
Mix warm water, degreaser or detergent, and air compressor oil in a bucket. Use this solution to scrub the inside of your tank with a brush. Make sure to pay extra attention to any areas that have excessive buildup or residue.
Step 5: Flushing with Water
To ensure thorough cleaning, make sure to rinse the tank meticulously with clean water. Continue rinsing until all residue and the cleaning solution have been completely removed, leaving no trace behind. You can accomplish this by using a hose to flush the tank or by repeatedly filling it with water and emptying it.
Step 6: Adding Cleaning Solution (if necessary)
If your tank has excessive buildup or stubborn residue that was not removed with the previous steps, you may need to add a more potent cleaning solution. Be cautious when handling these stronger solutions and make sure to follow all safety precautions.
Step 7: Agitating and Brushing the Tank Interior
To effectively clean your tank, especially if you have added a stronger cleaning solution, take a brush and gently agitate and scrub the interior surfaces. Pay close attention to all affected areas, ensuring thorough coverage before moving on to the next step.
Step 8: Rinsing and Draining the Tank
After completing all necessary cleaning and scrubbing, repeat the rinsing process to remove any remaining residue or cleaning solution. Once done, drain all the water from the tank before moving on to the next step.
Step 9: Drying the Tank
To prevent any potential rust or corrosion, it is crucial to thoroughly dry the tank. This can be achieved by using an air blow gun or a clean towel to remove any excess moisture from all surfaces, including valves and connections. By taking the time to ensure that every nook and cranny is free from dampness, you are effectively safeguarding the tank against any future damage. Remember, a little extra effort now can go a long way in preserving the longevity and performance of your tank.
Reassembling the Tank Drain Valve and Finishing Up
After the tank has been thoroughly cleaned and dried, reattach the drain valve using an appropriately sized wrench. Make sure to tighten it securely to prevent any leaks. If your tank has a separate oil filter, now would be the time to replace it with a new one. Once all connections are secure and in good working condition, you can plug in the air compressor.
Testing the Air Compressor After Cleaning
After completing the cleaning process, it is crucial to test the air compressor before using it again. Run the compressor for a few minutes and check for any unusual sounds or leaks. If everything seems to be in good working order, you can continue using your air compressor as usual. By following this thorough cleaning guide regularly, you can ensure that your air compressor remains in optimal condition and performs at its best.
Proper Disposal of Cleaning Materials
After cleaning your air compressor tank, it is crucial to dispose of any used cleaning materials and chemicals properly. Follow the manufacturer’s instructions for safe disposal or contact your local waste management facility for guidance. Never pour any leftover cleaning solutions down the drain as they can be harmful to the environment. By disposing of these materials responsibly, you are not only protecting the environment but also preventing potential hazards to yourself and others. Remember, safety is always a top priority when it comes to maintaining and cleaning your air compressor tank. So, make sure to take all necessary precautions and follow proper disposal procedures for a safe and effective cleaning experience.
Additional Tips for Maintaining Your Air Compressor Tank
Cleaning your air compressor tank is just one aspect of properly maintaining it. Here are a few additional tips to ensure your tank remains in top condition:
- Regularly check for and repair any leaks or damage
- Check and replace filters as needed
- Keep the tank and surrounding area clean and free from debris
- Drain moisture from the tank after each use
By following these tips, you can extend the lifespan of your air compressor tank and ensure it continues to perform at its best.
Troubleshooting Common Issues
If you encounter any issues with your air compressor tank, here are a few common problems and possible solutions:
- Lack of pressure: Check for any leaks or damaged components and repair as needed. Also, make sure the tank is sufficiently filled with air.
- Moisture in the tank: Drain moisture after each use and clean the tank regularly to prevent buildup.
- Excessive noise: Check for loose connections or worn-out parts and tighten or replace them as necessary.
If the issue persists, consult the manufacturer’s manual or contact a professional for assistance. Remember, proper maintenance can help prevent common issues from occurring in the first place.
FAQs for Cleaning Air Compressor Tanks
Can you clean inside an air compressor tank?
Yes, it is possible to clean the inside of an air compressor tank. However, it is important to follow proper safety procedures and use the appropriate cleaning materials
Is it safe to repair an air compressor tank?
Repairing an air compressor tank can be safe if it is done correctly and by a qualified professional. However, it is important to consider the age, condition, and type of damage to the tank before attempting any repairs.
Is it OK to leave compressor tank pressurized?
It is generally not recommended to leave an air compressor tank pressurized when it is not in use. This is because the pressure inside the tank can cause stress on the tank and its components, which may lead to leaks or even a tank rupture. In addition, leaving the tank pressurized can also be a safety hazard, especially if the tank is accidentally turned on or if there is a malfunction in the pressure relief valve.
Can I run a compressor without a tank?
Yes, it is possible to run an air compressor without a tank, but it may not be practical or efficient for certain applications. An air compressor without a tank is often called a “pancake compressor” or a “hot dog compressor” and is typically smaller and more portable than a compressor with a tank. These types of compressors are often used for light-duty tasks such as inflating tires or powering small pneumatic tools.
Conclusion
Cleaning your air compressor tank is a necessary part of proper air compressor maintenance and best practices. It’s essential to understand why, when, and how to clean the tank. By taking into account its condition, and safety considerations, and understanding the various steps for cleaning an air compressor tank, you can ensure that it is properly cleaned. In addition to standard cleaning procedures, it’s important to keep an ongoing maintenance schedule that will keep away dust and dirt build-up, making sure it’s running at optimal performance. With these tips in mind, any user can safely and efficiently keep their air compressor tanks clean and well-maintained over time.
If problems arise, clear troubleshooting guidelines provide pathways for resolution so users have maximum peace of mind. Take action now and give your air compressor tanks the care they deserve!


